Sign writing & gilding How To Hand Paint & Gold Leaf A Glass Sign
![](https://a.storyblok.com/f/144881/3016x1885/2db4d9e6f0/handpainting-no-75-screenshot-jpegs-1.jpg/m/1500x1000)
![](https://a.storyblok.com/f/144881/2996x1873/db15d171dd/handpainting-no-75-screenshot-jpegs-32.jpg/m/1500x1000)
![](https://a.storyblok.com/f/144881/3001x1876/d02a23c8bf/handpainting-no-75-screenshot-jpegs-26.jpg/m/1500x1000)
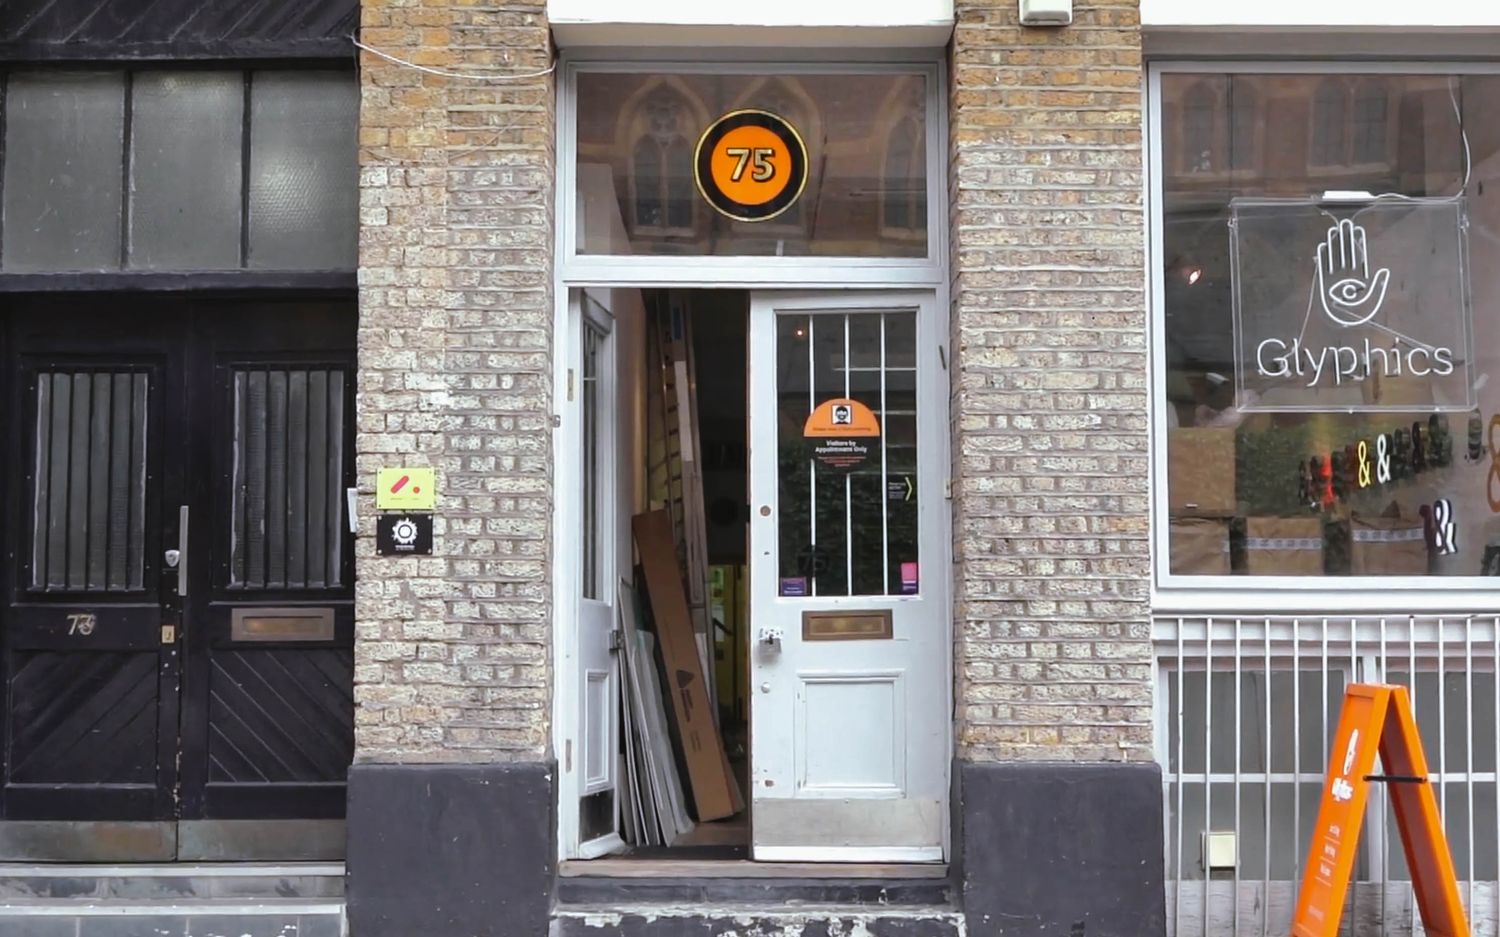
As a signmakers founded by craftspeople back in 1985, we went back to our art & design roots and chose the vintage technique of sign writing for our very own shop front – hand painting our street number on a fixed panel of glass above our front door and layering it in gold leaf for a creative flash.
Smack bang in the middle of Shoreditch, we’re blessed to be part of a community of artisans who believe in safeguarding traditional skills, and so in keeping with that spirit we’ve archived our insider secrets to help demystify the magic for you.
What does this tutorial cover?
For this sign, we forewent freeform lettering and chose to use a template instead, which is something we believe everyone can do! So feel free to skim these tips and tricks for your individual pursuits in this article:
The required tools and materials for hand painting
The basics of a sign painting brush
Things to consider when preparing your environment
The process of creating your own hand painted sign on a fixed pane of glass
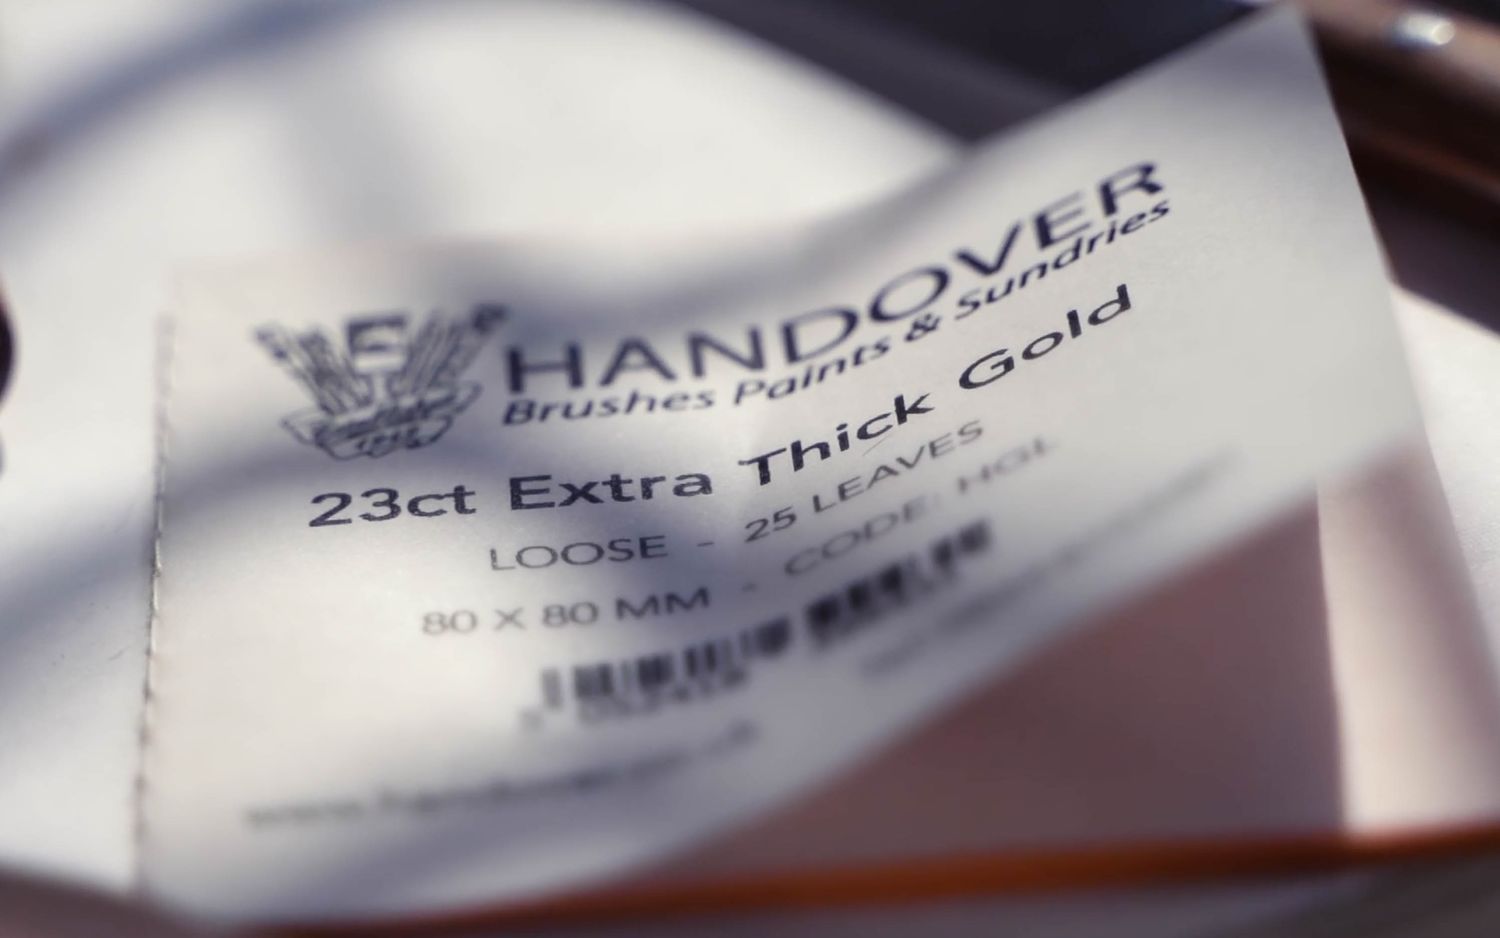
The required tools and materials for gilding glass
How to prepare and add gold leaf to a hand painted glass sign
The best way to finish off your sign so that it’s protected and easy to clean
Or take a saunter into our process with the film above, which is a bit of fun for us and a lot of informative for you!
How did you get started?
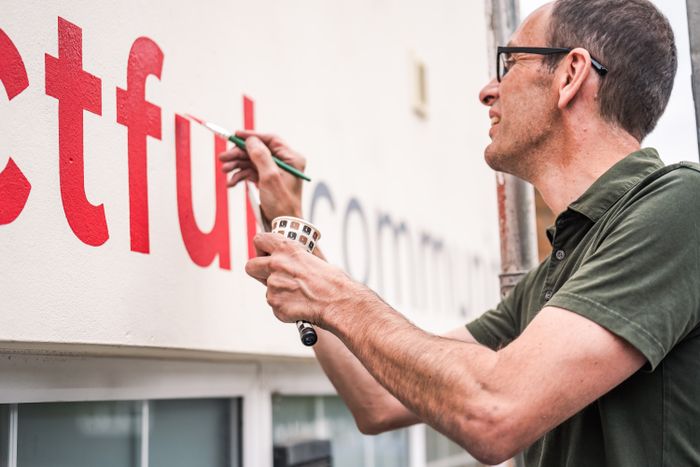
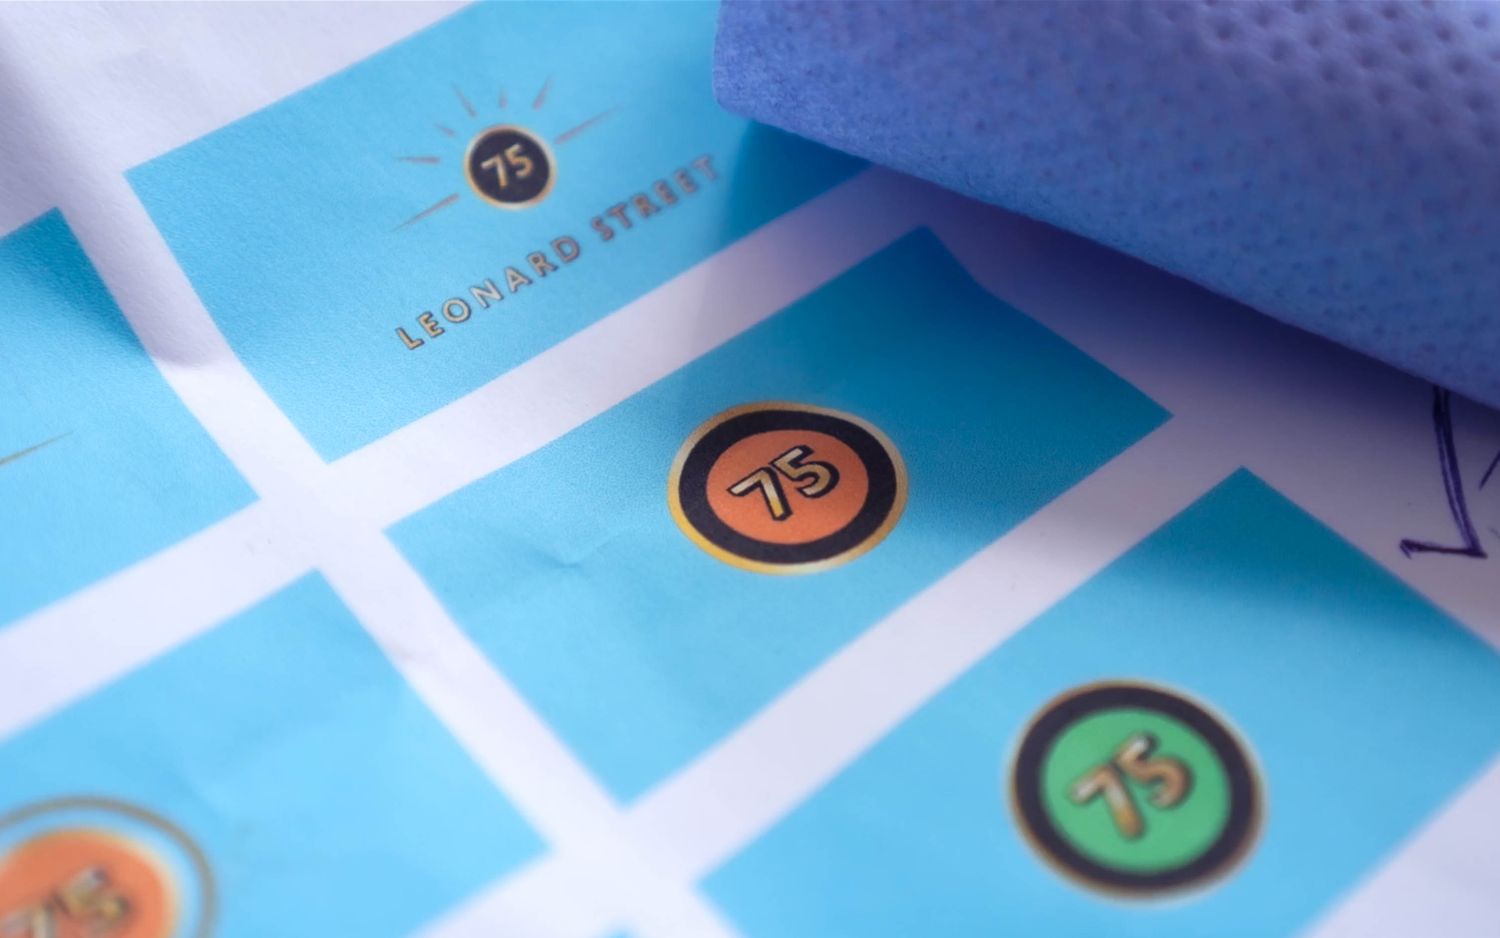
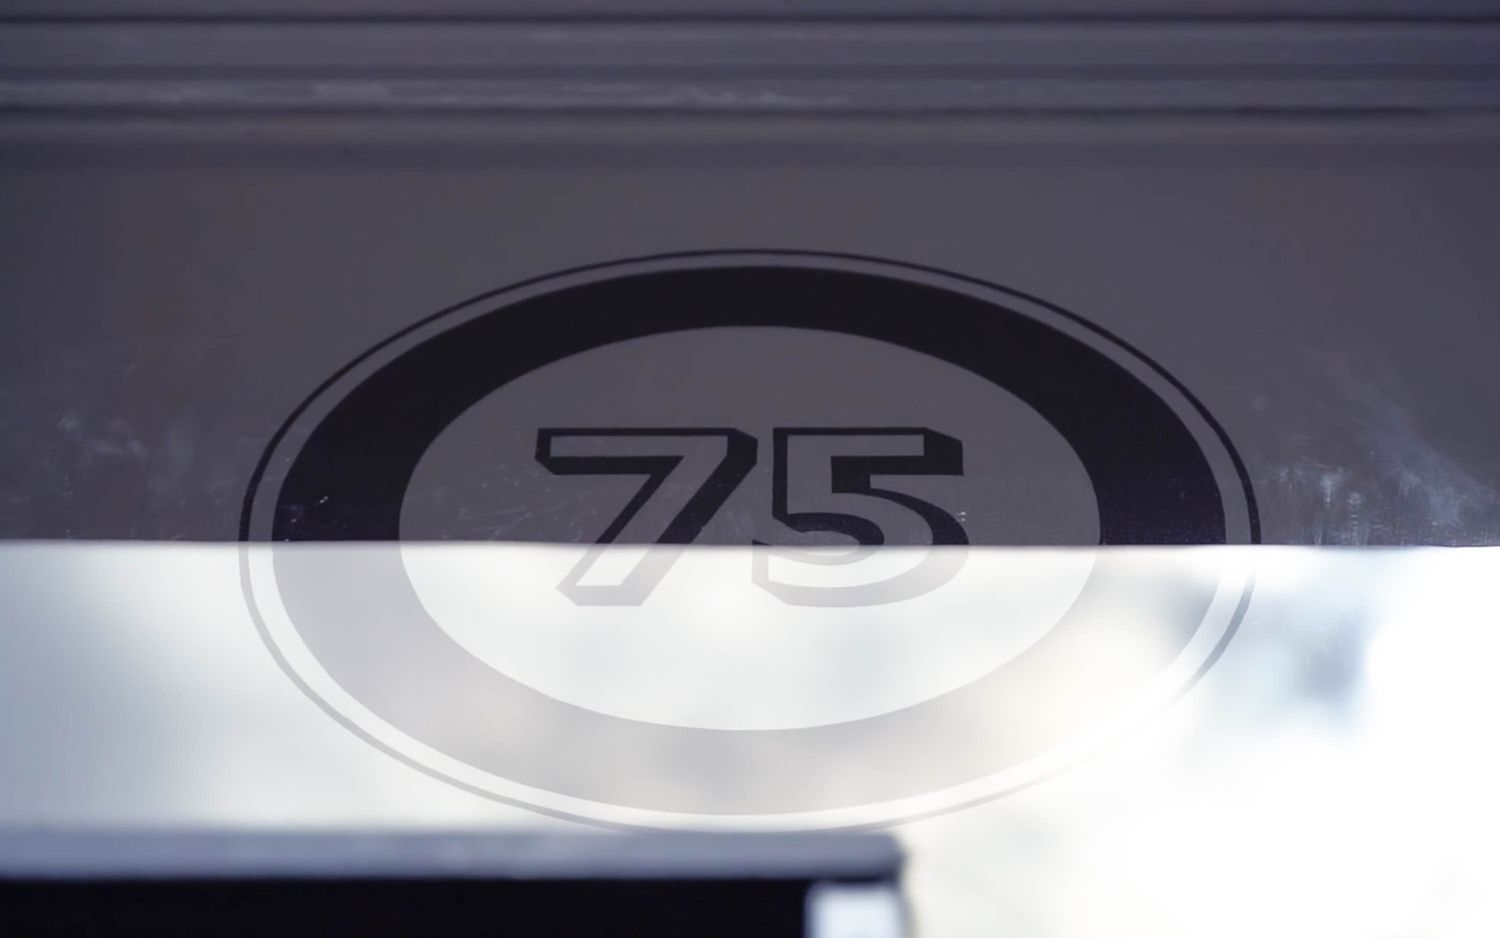
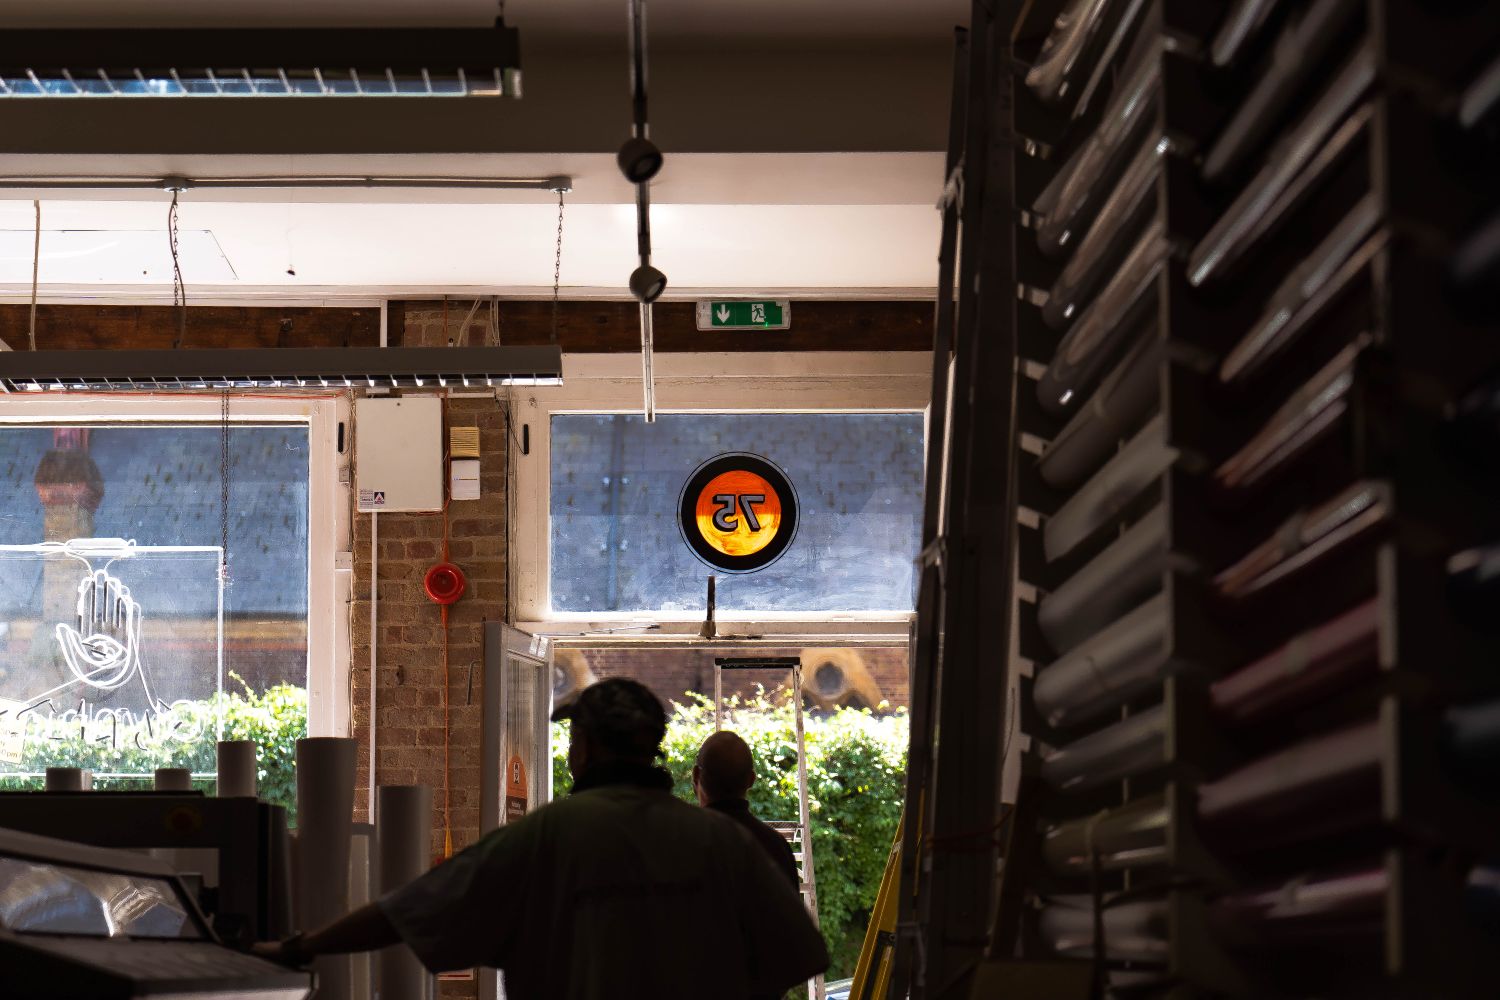
First up, we designed a bespoke street number sign for added kerbside appeal.
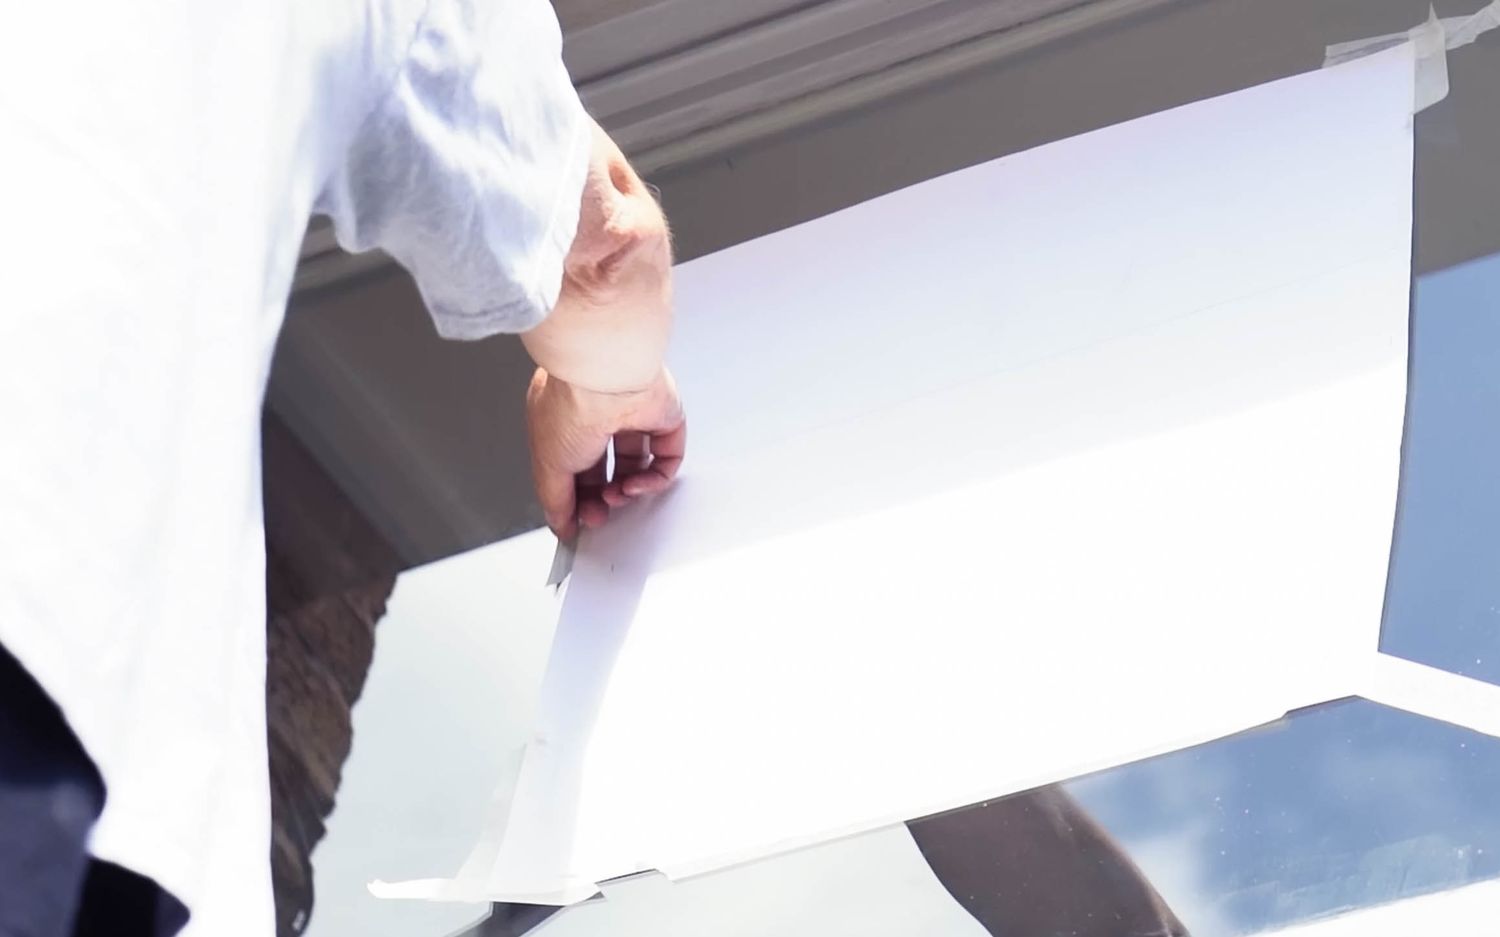
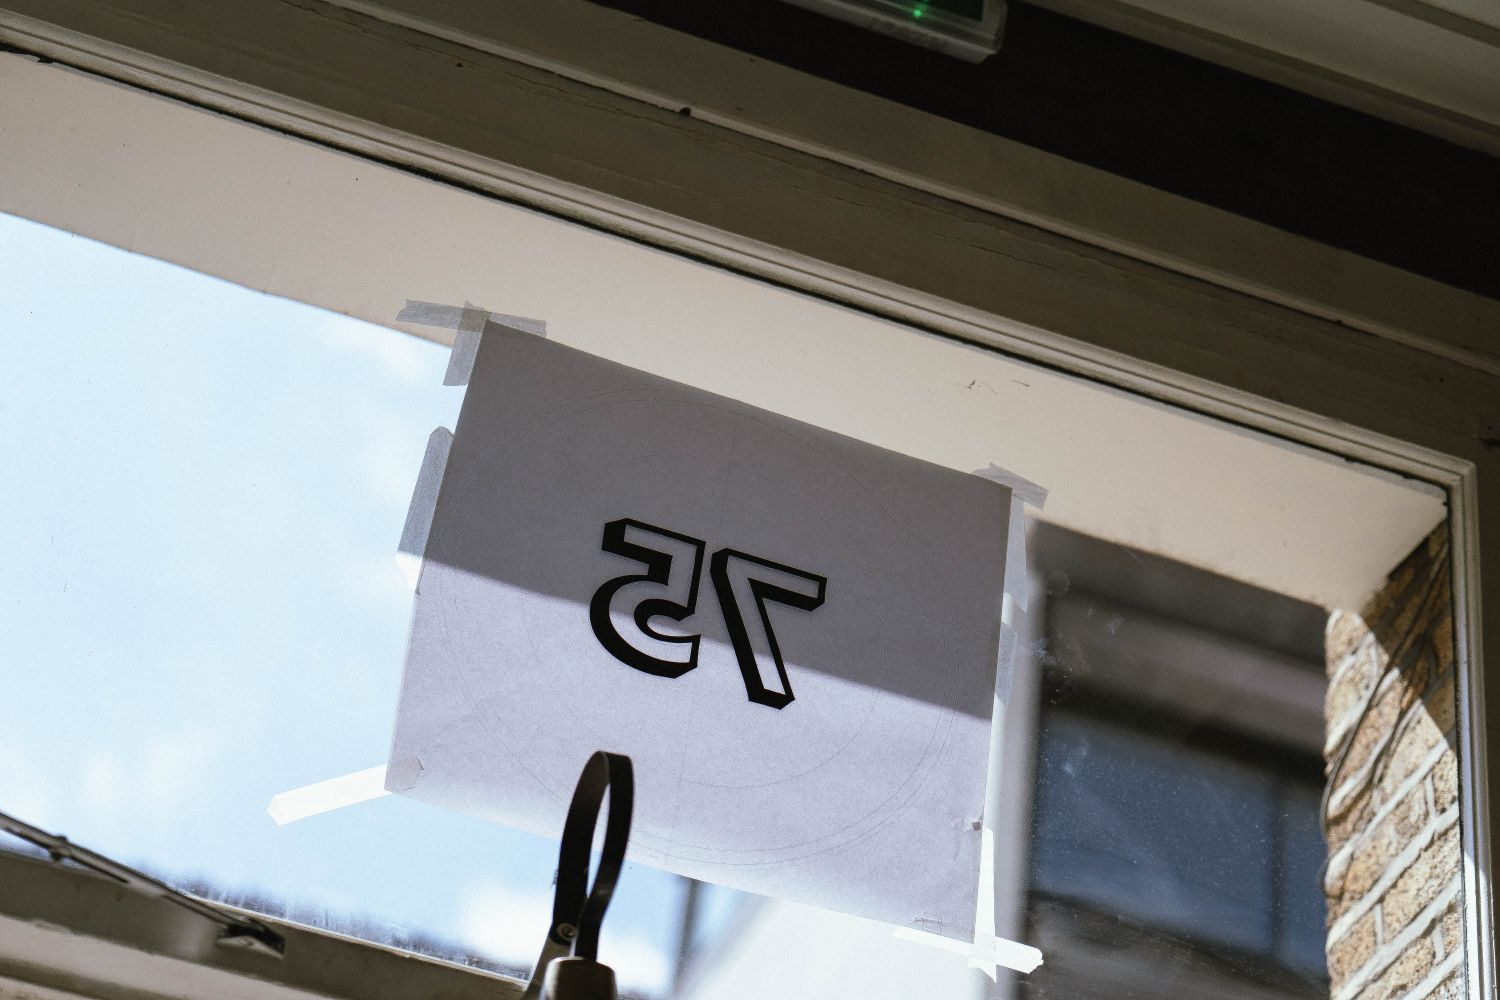
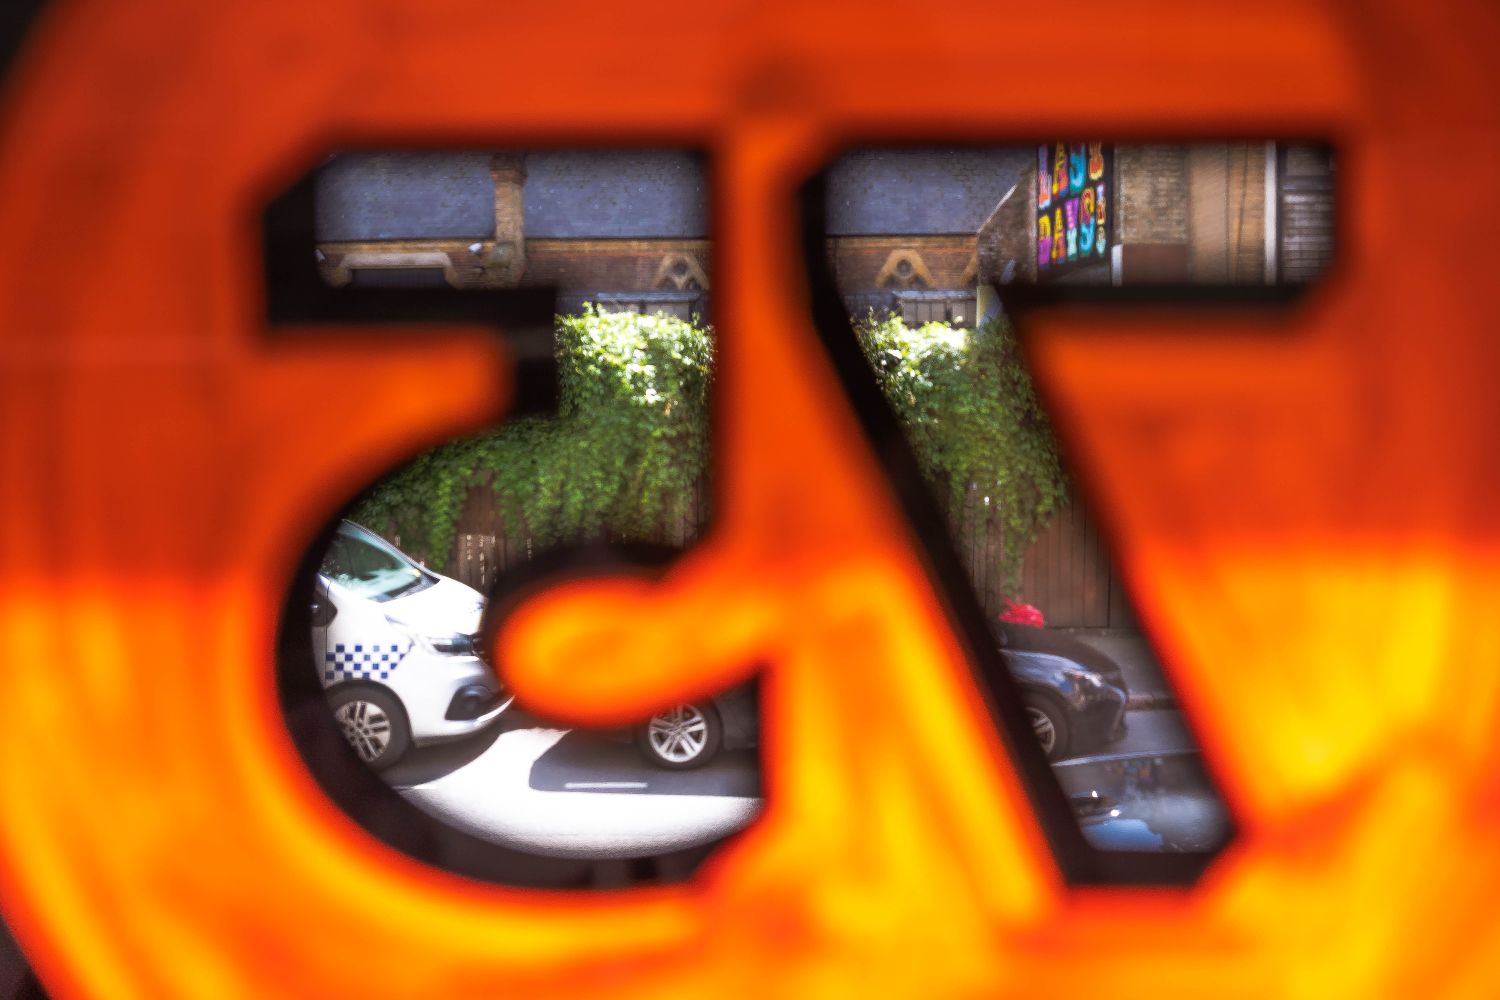
As we’d be painting a street facing sign from the inside, we flipped the template to create a mirror image.
It was then printed to scale (though if you feel like it you could also draw it) and stuck to the outside of our window, facing in.
![A print out of the design visual for our hand painted and gold leaf sign](https://a.storyblok.com/f/144881/00558ee757/handpainting-no-75-screenshot-jpe-gs-14.jpg/m/1500x0)
![The guys at Glyphics discussing the positioning of our gold leaf sign](https://a.storyblok.com/f/144881/a15874def7/handpainting-no-75-edited-jpe-gs-6.jpg/m/1500x0)
![Putting up the printed template for the hand painted and gold leaf shop front sign](https://a.storyblok.com/f/144881/5dbf77c4d2/handpainting-no-75-screenshot-jpe-gs-2.jpg/m/1500x0)
![Our signwriter making sure the template for our gold leaf sign is on straight](https://a.storyblok.com/f/144881/e0a95a68a8/handpainting-no-75-edited-jpe-gs-10.jpg/m/1500x0)
![Our signwriter cleaning the work surface for our gold leaf sign](https://a.storyblok.com/f/144881/3c25fa2e8f/handpainting-no-75-screenshot-jpe-gs-4.jpg/m/1500x0)
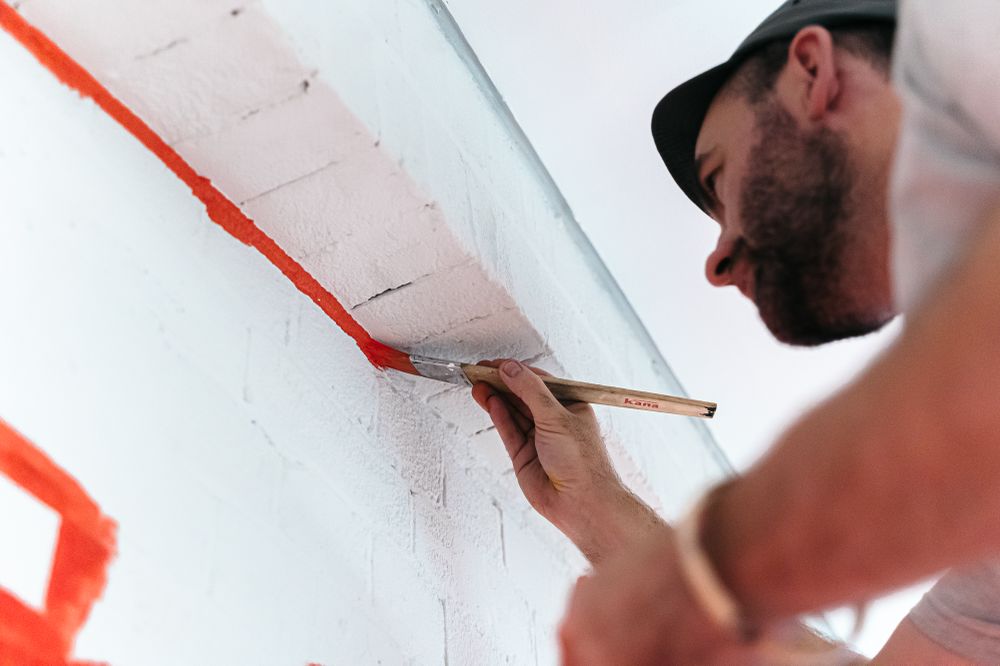
How can I prep my environment?
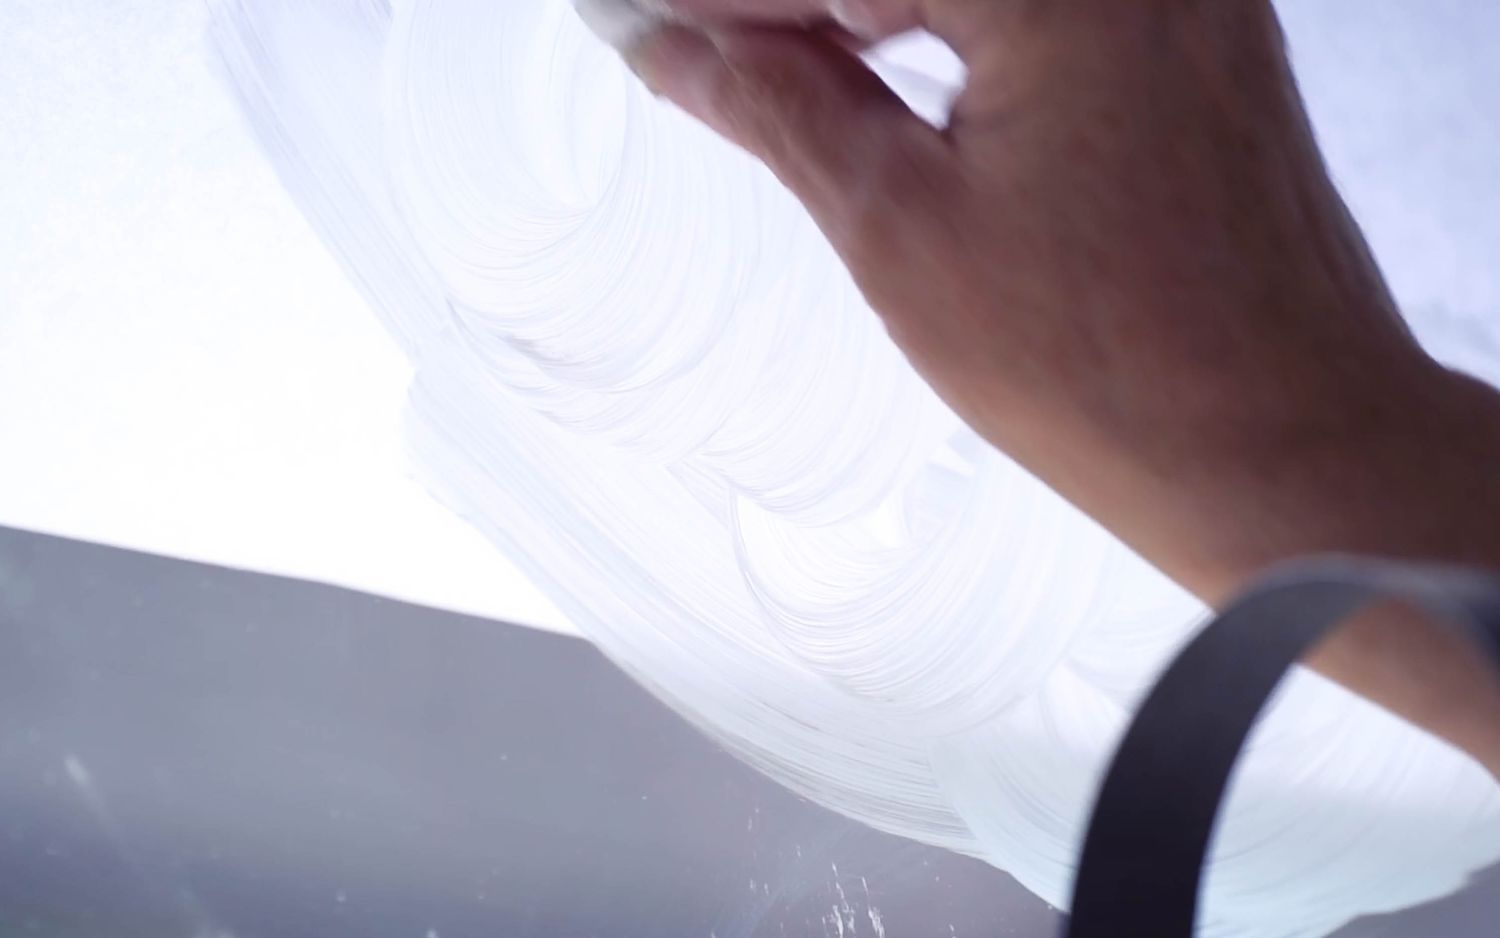
Before reverse painting, we degreased our glass with a cleaning powder like Pierre d’Argent. Wiping off residue helps with even application and protecting the work.
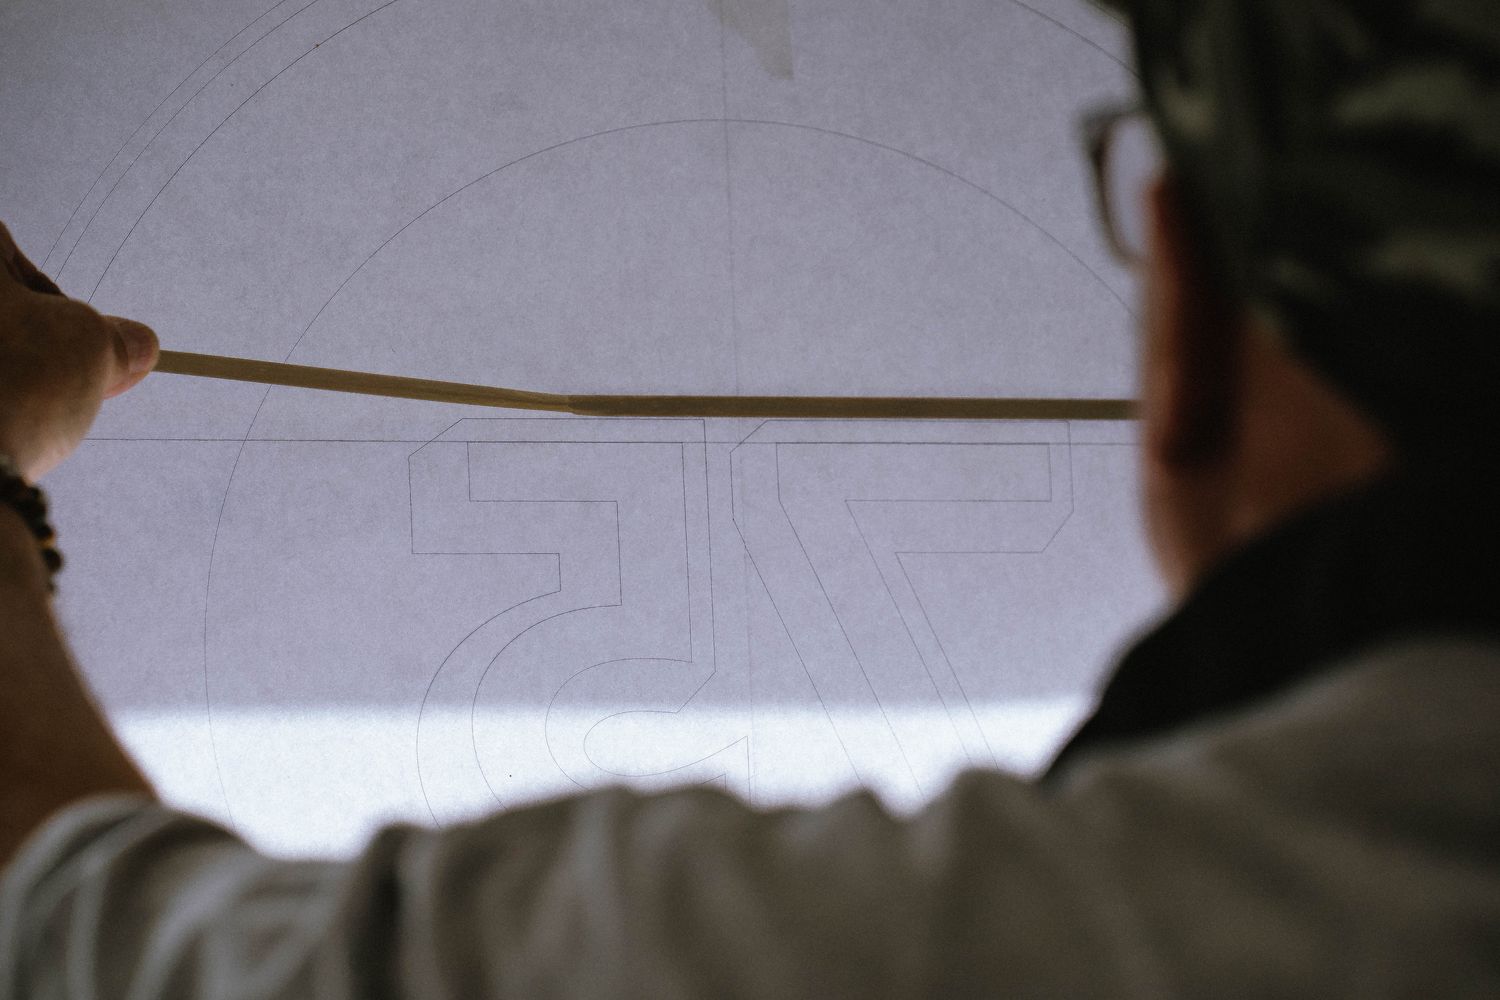
Working on a fixed window pane up high meant we had to contend with our given work space, so we double checked the template was straight and got our materials to hand before climbing up the ladder.
![Here's a Mahl Stick for keeping steady while signwriting, sitting amongst old friends - brushes, paint and gold leaf](https://a.storyblok.com/f/144881/dbf1e87a06/handpainting-no-75-screenshot-jpe-gs-7.jpg/m/1500x0)
![A chisel tip brush being flattened ready for hand painting a glass sign](https://a.storyblok.com/f/144881/2e6e98e82b/handpainting-no-75-screenshot-jpe-gs-6.jpg/m/1500x0)
![Mixing the synthetic enamel for the outline of our hand painted gold leaf sign](https://a.storyblok.com/f/144881/16e61bf459/handpainting-no-75-screenshot-jpe-gs-5.jpg/m/1500x0)
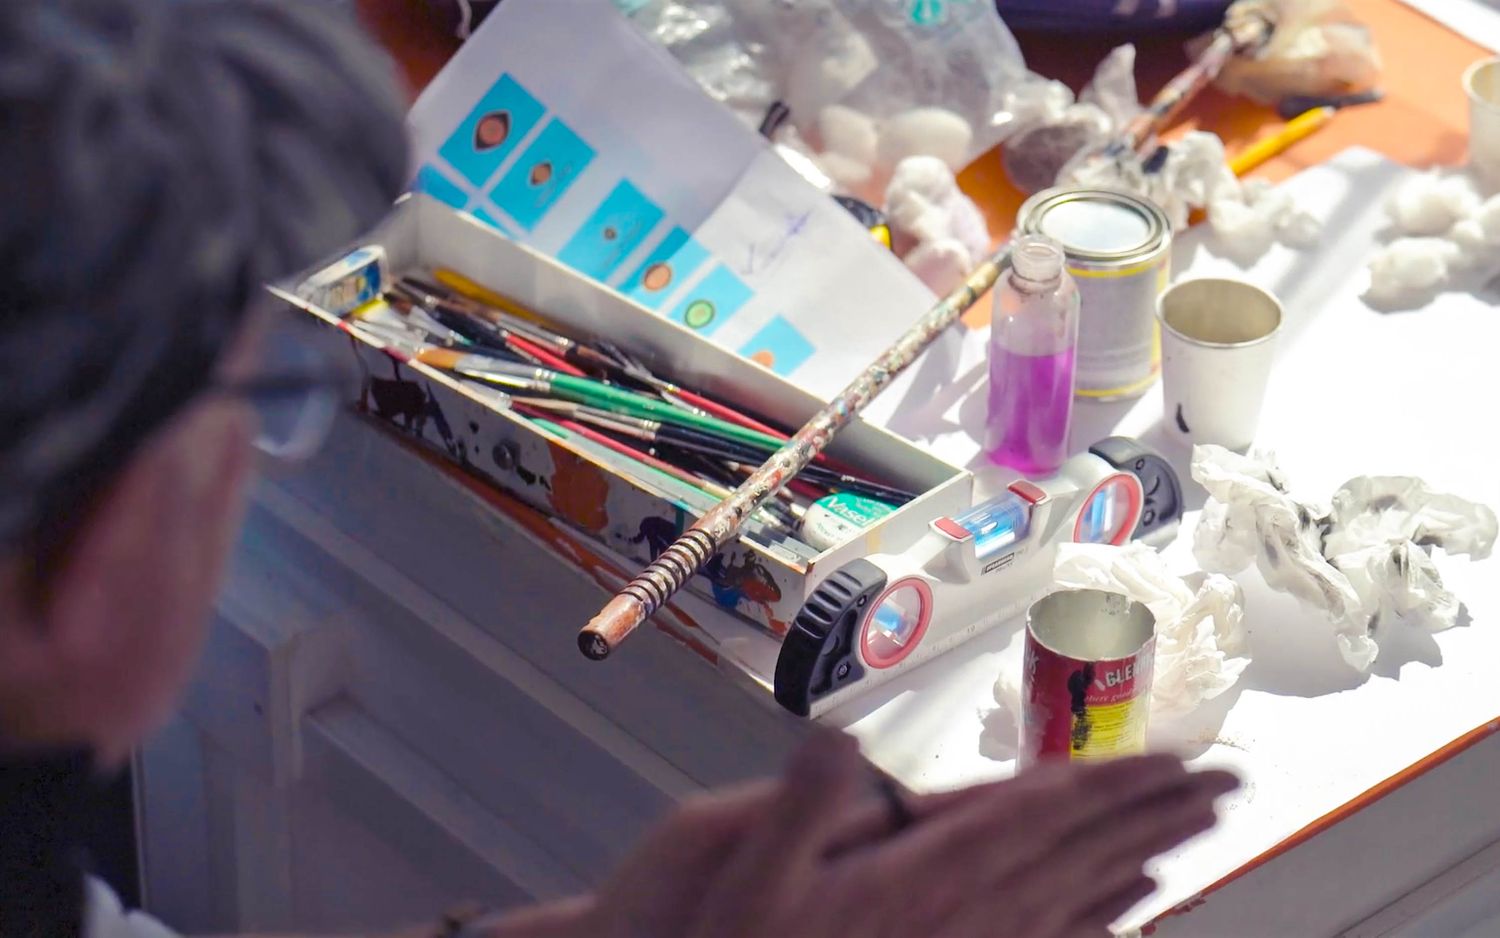
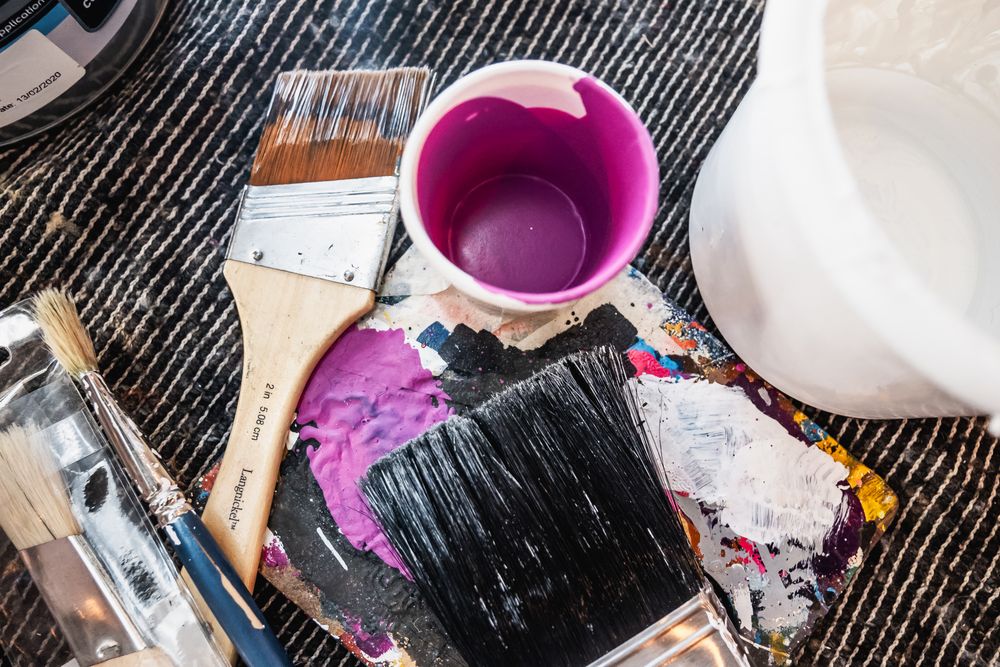
Must have materials:
There are a lot of variables in each hand painting project but these are what we would consider the basics:
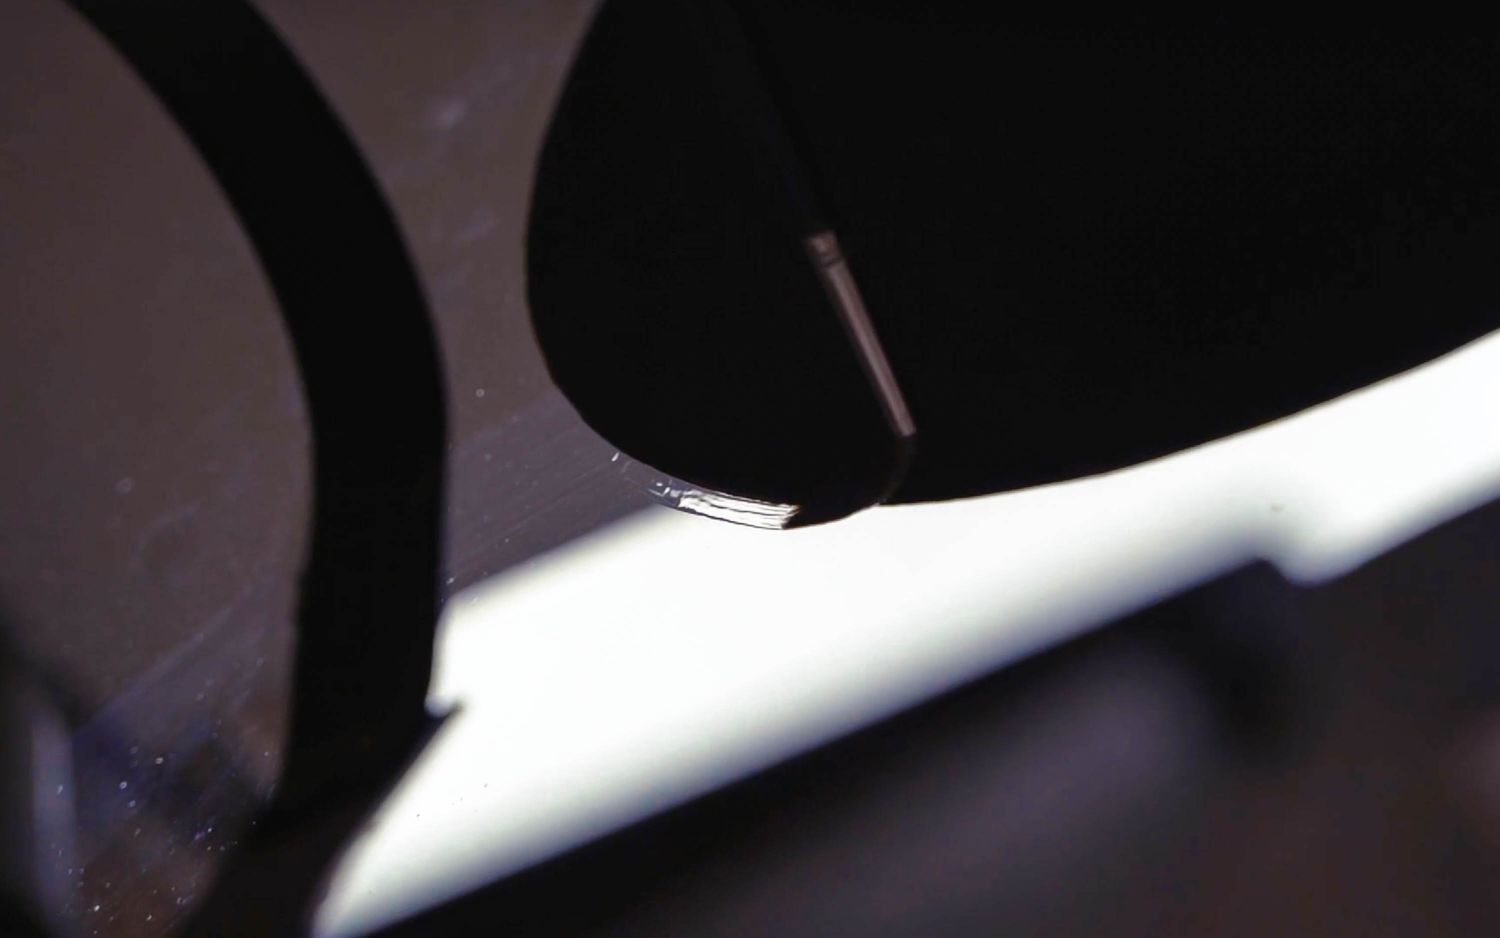
A Mahl Stick – it helps signwriters get comfortably into postures that enable greater control over stroke pressure and length, as well as acting as a compass when it comes to curved shapes.
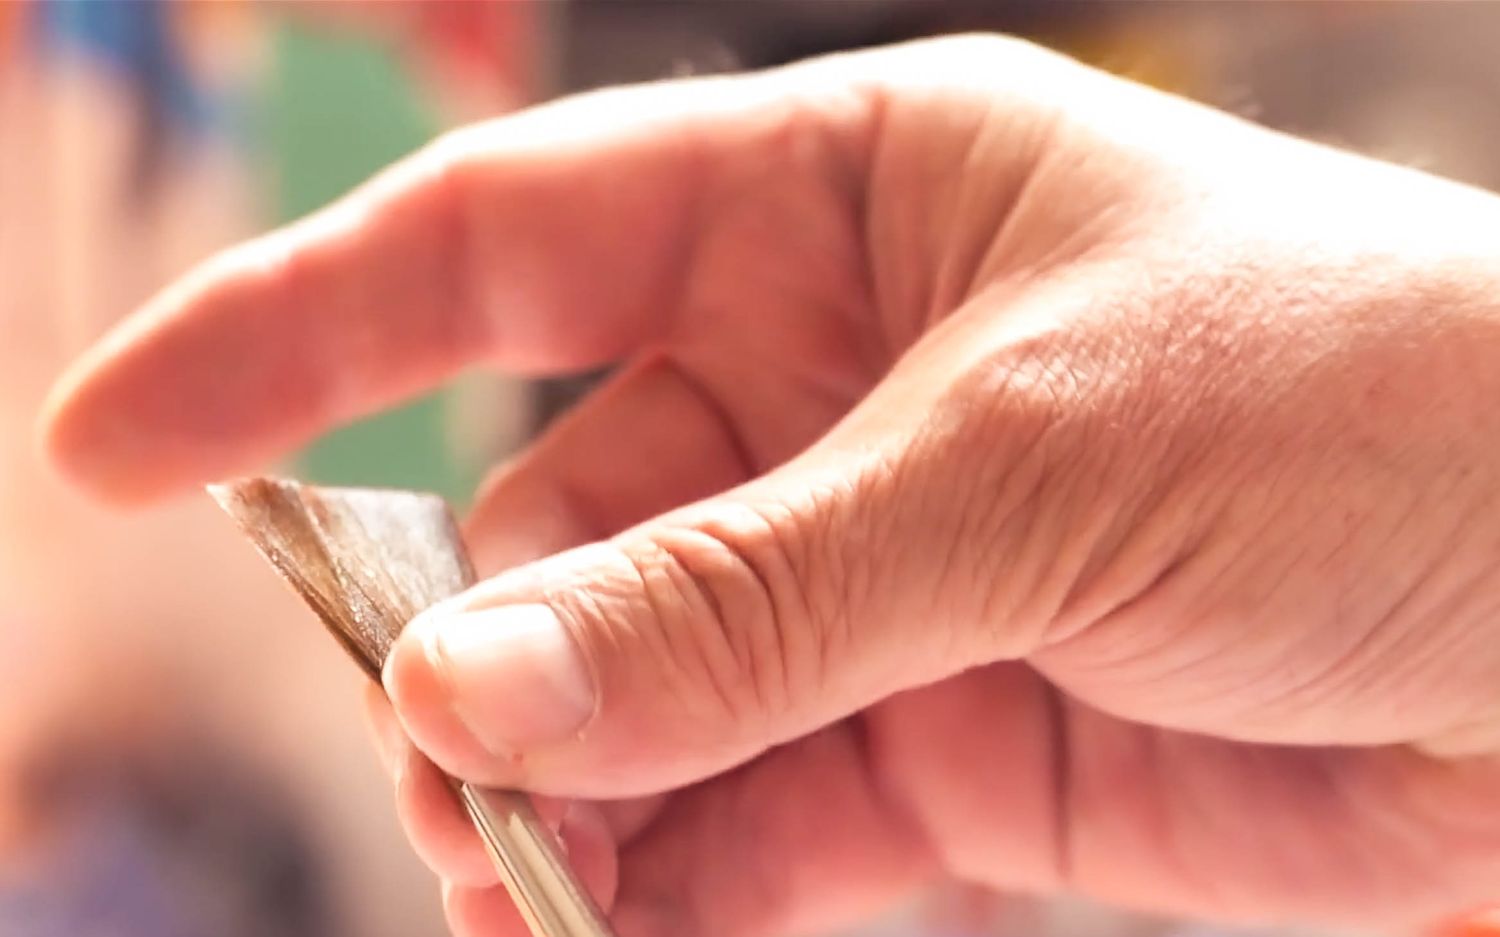
Chisel tip brushes – they have thin long bristles that can pull flat strokes, or taper into sharp lines depending on your hold – perfect for hand painting block lettering or serifs like we did.
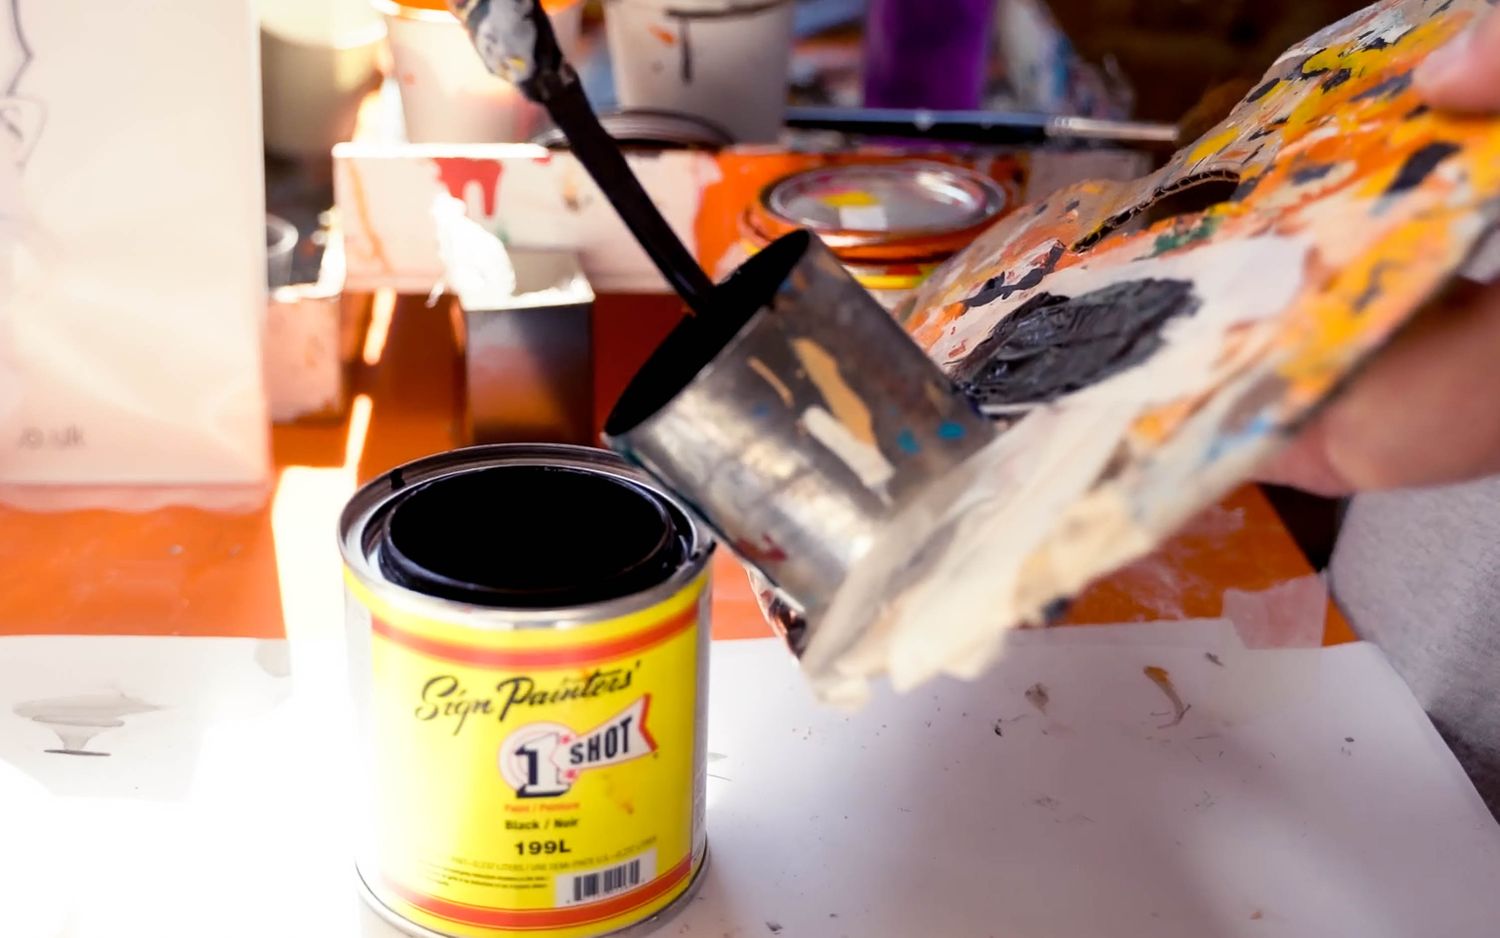
Synthetic enamels – these are the most durable and efficient paint available. Being oil based, mineral spirits help thin them out to a consistency that’s easy to work.
![The black outline of our sign begins to take shape ready for filling in with orange paint and gold leaf](https://a.storyblok.com/f/144881/f7ae7e137c/handpainting-no-75-edited-jpe-gs-4.jpg/m/1500x0)
![The sun shines through the window pane where our hand painted gold leaf glass sign begins to take shape](https://a.storyblok.com/f/144881/8672c03807/handpainting-no-75-screenshot-jpe-gs-10.jpg/m/1500x0)
With set up done, what’s step 1?
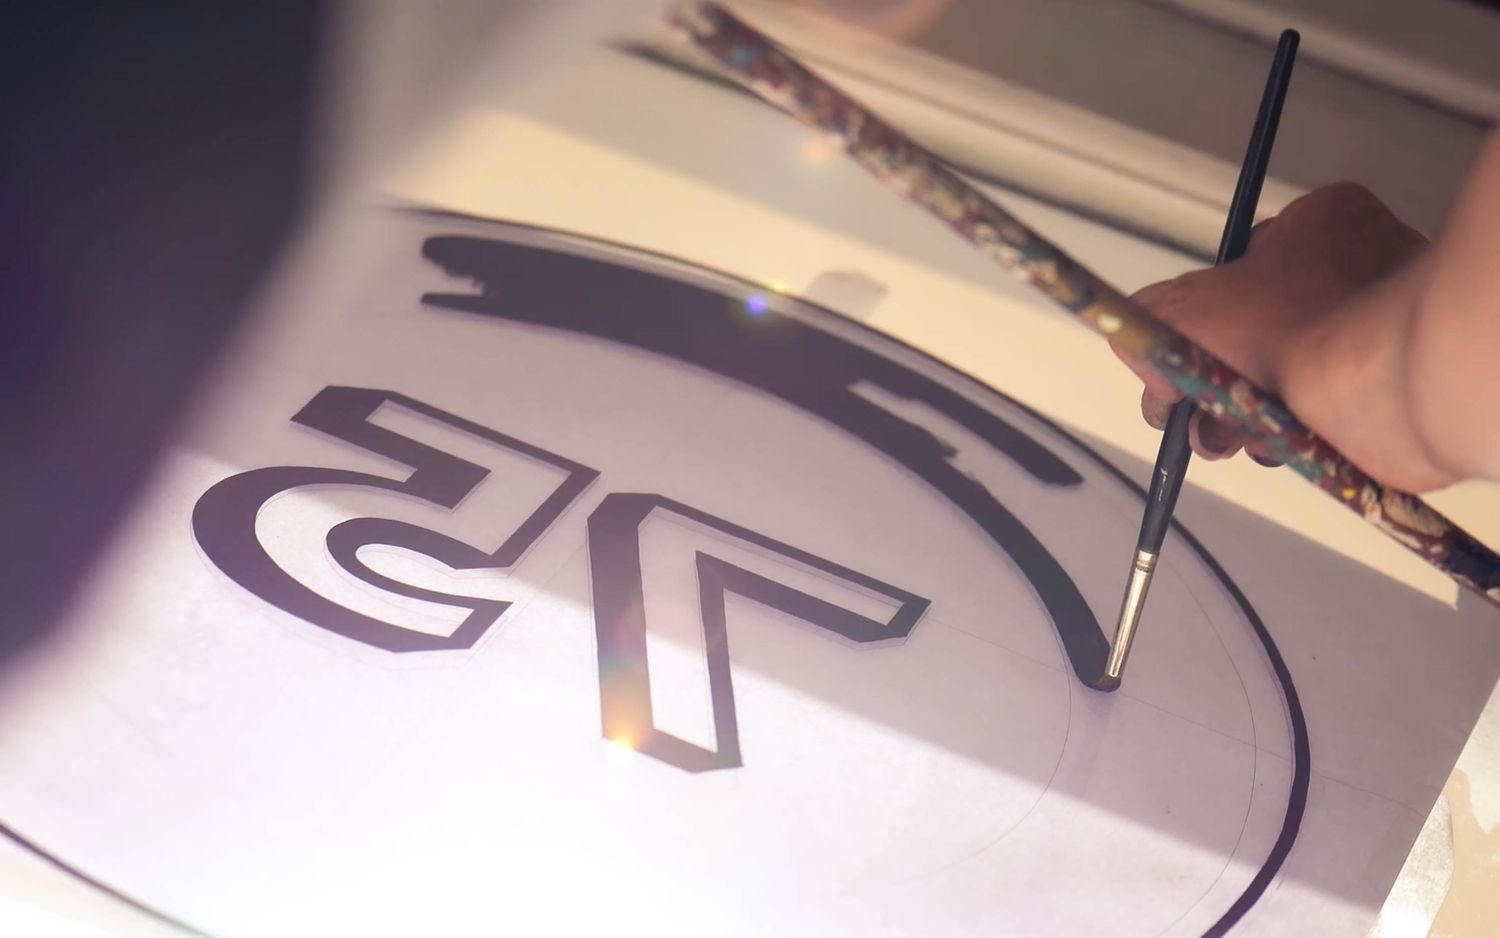
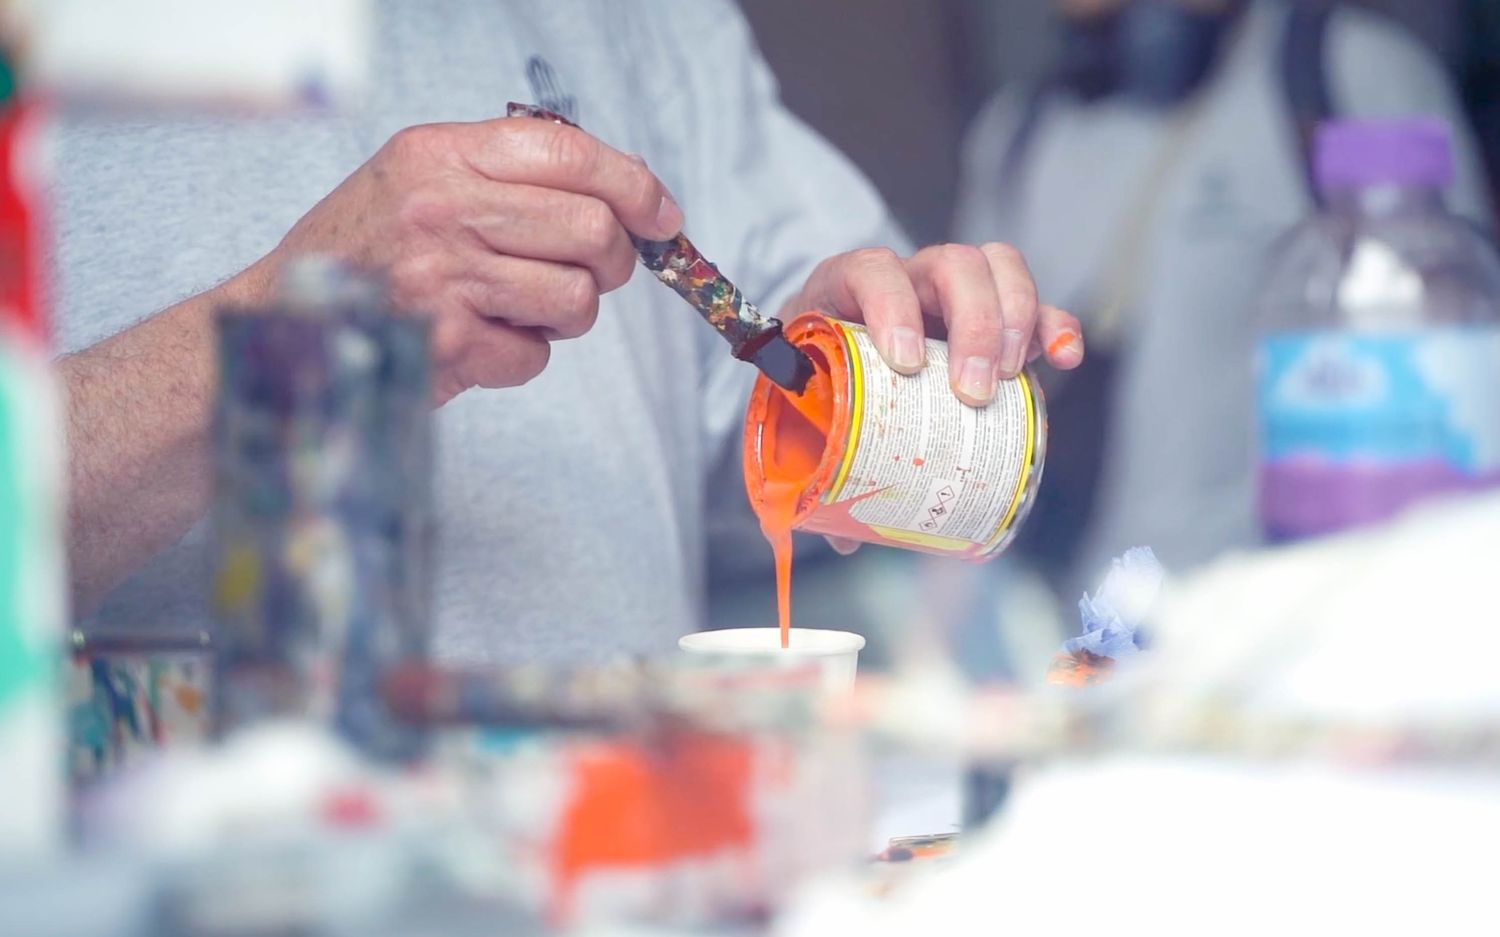
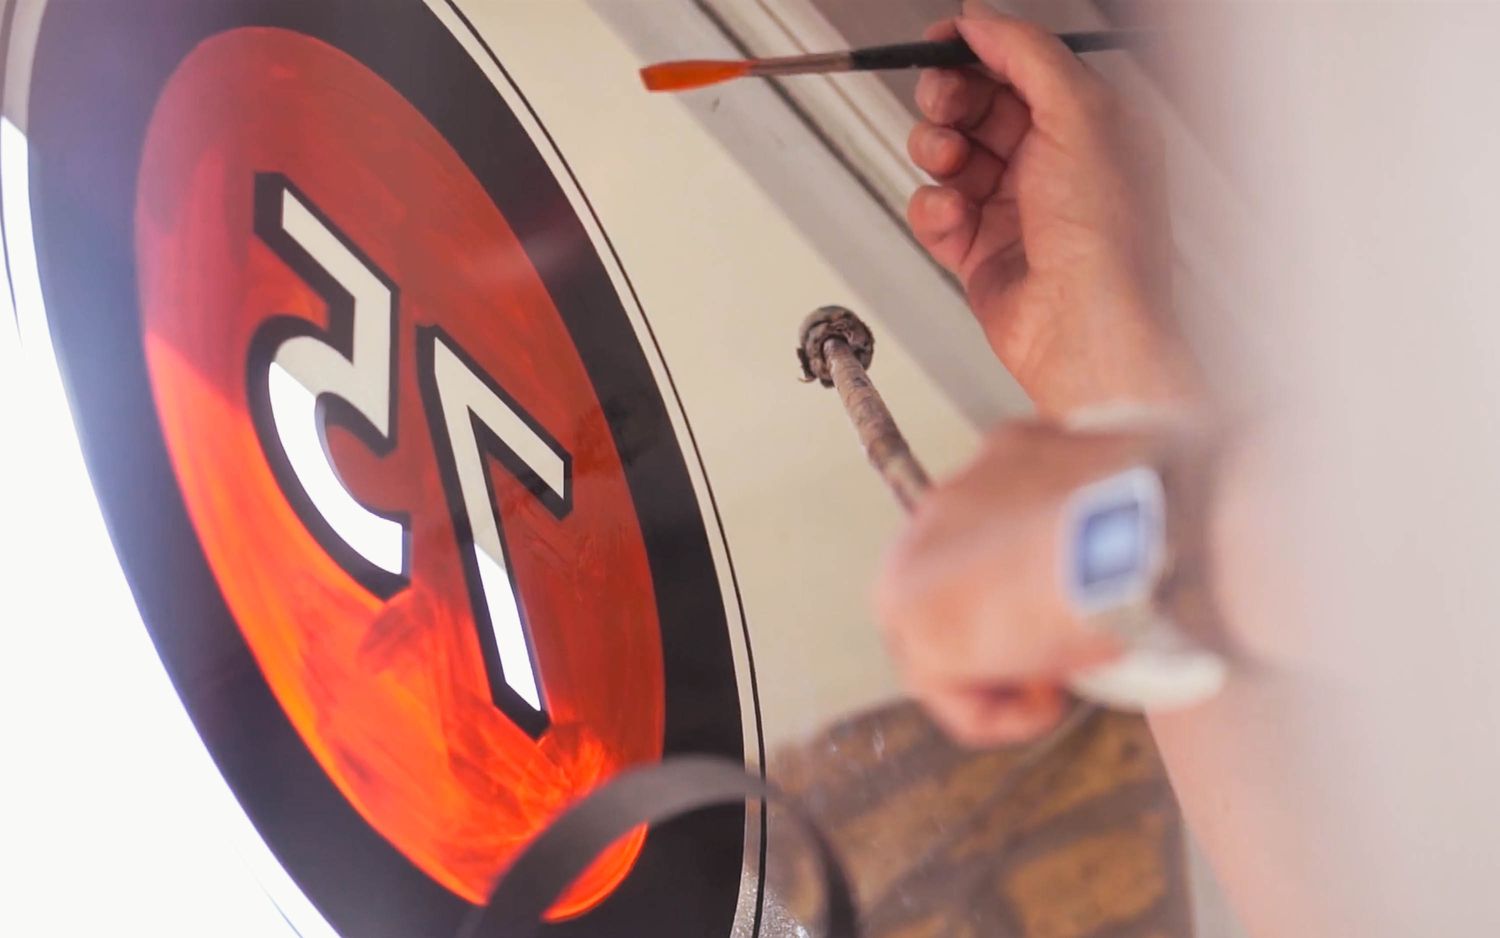
It’s time to get our hands dirty with some outlines! Black paint is often the starting point for hand painted glass signs as it quickly dries up nice and solid.
Before you start, you may need to loosen your paint a little with mineral spirit to create a consistency that picks up onto your brush without sticking to it or dripping off of it.
![Bold black strokes block out the outline for our hand painted gold leaf sign](https://a.storyblok.com/f/144881/fb42594f2a/handpainting-no-75-screenshot-jpe-gs-11.jpg/m/1500x0)
![Now that the outline for our handpainted gold leaf sign is done, the template is taken off](https://a.storyblok.com/f/144881/09123c8f69/handpainting-no-75-screenshot-jpe-gs-12.jpg/m/1500x0)
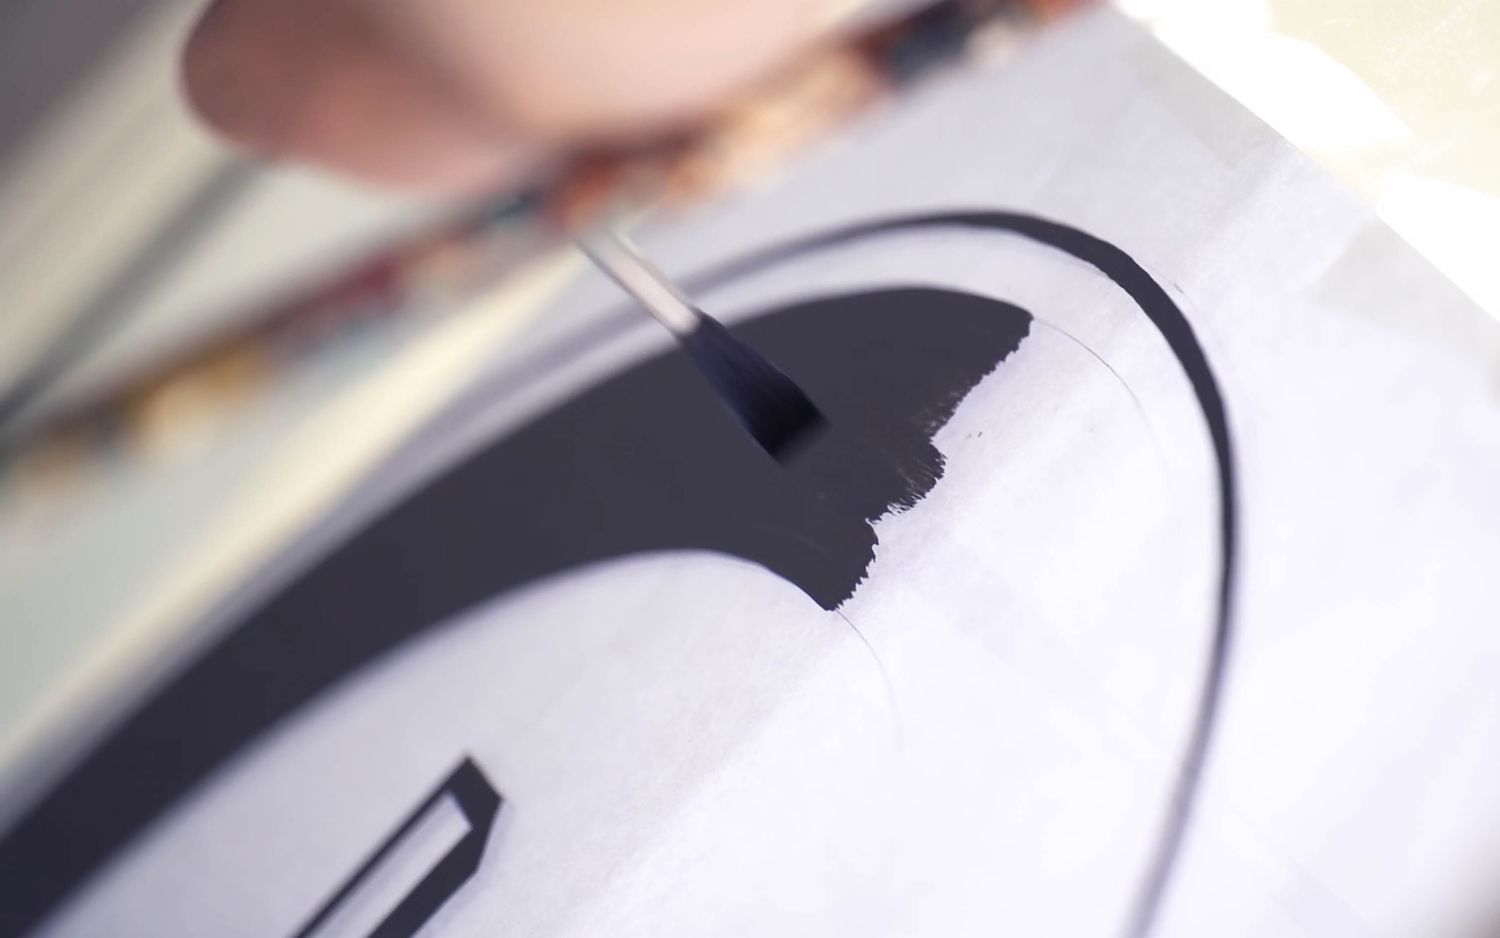
Once you’ve found the happy medium, take your cup, follow your template and begin to trace the profile of your sign through the glass.
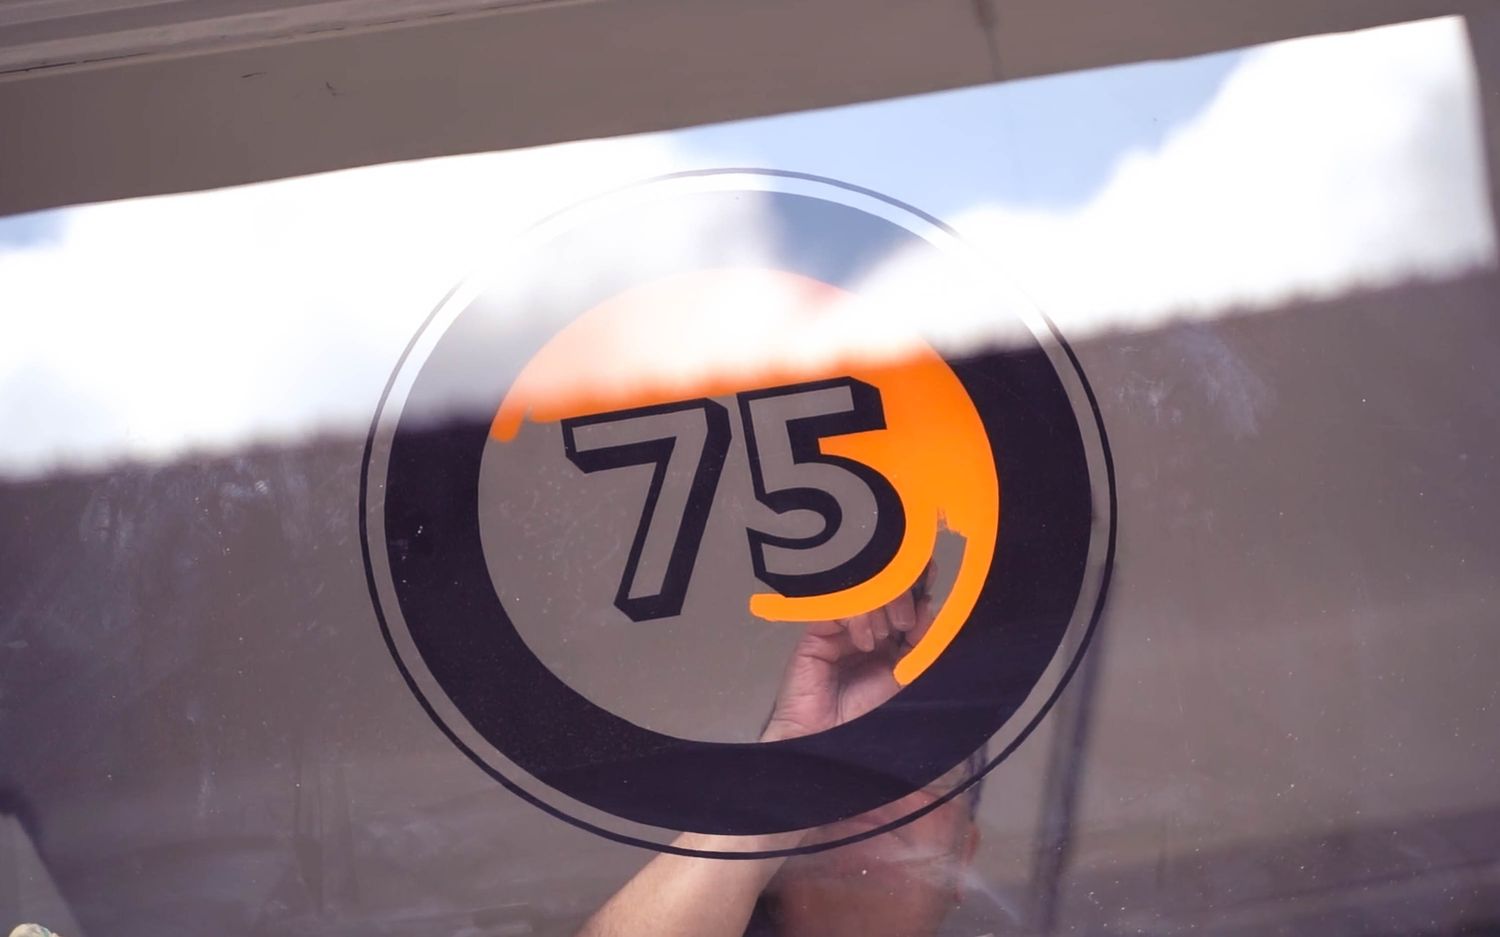
With our black outline blocked out, the template can be removed with the rest of the sign ready for filling in freehand.
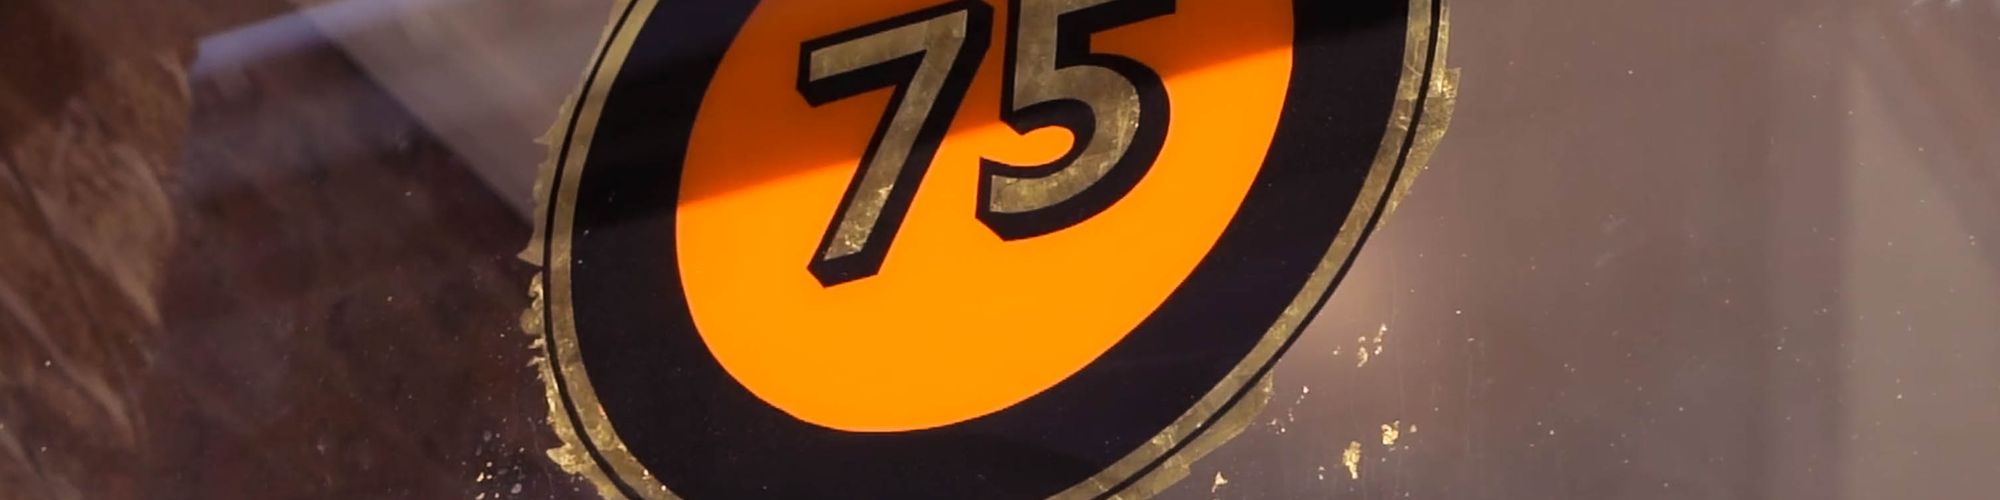
A lick of flaming orange awaits to set no. 75 ablaze…
![Pouring the orange paint in preparation for the next, colourful stage of our vintage gold leaf sign](https://a.storyblok.com/f/144881/058d893dcb/handpainting-no-75-screenshot-jpe-gs-15.jpg/m/1500x0)
Step 2
Load up your brush with your chosen colour and on the edge of your cup, slide the excess paint off both sides.
You want to get a whippy tip that’s both responsive and carries enough paint to complete a stroke.
Hot tips!
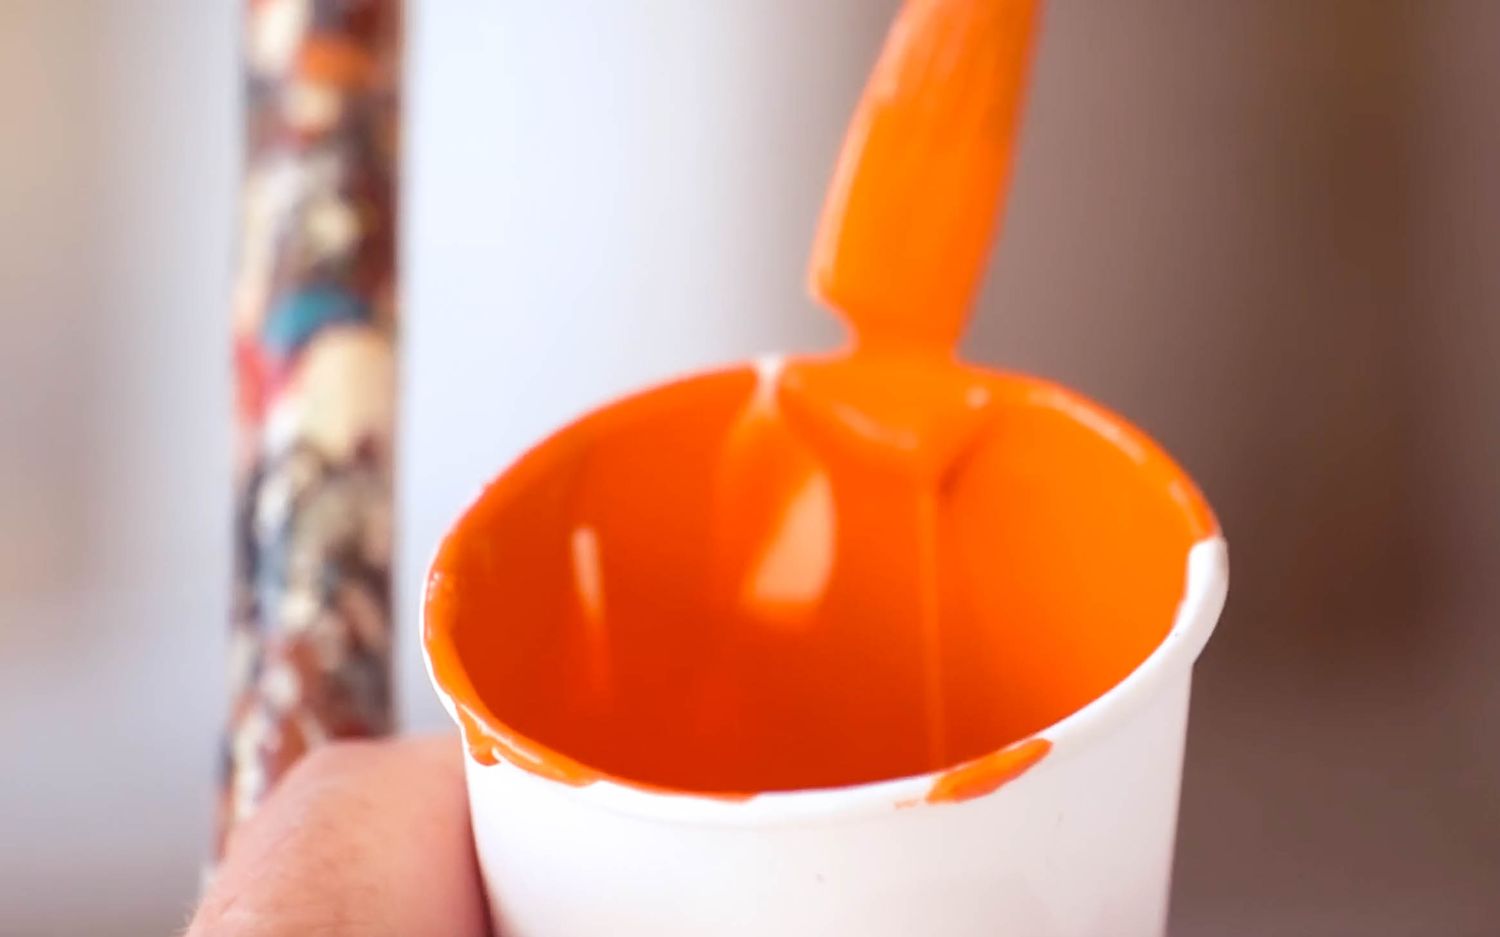
1. Reds and oranges traditionally offer poor coverage, so we’ve used One Shot’s lettering enamel for its flow, opacity and rich tone.
2. Though brushstrokes are visible on the inside of the glass, the enamel dries opaque on the outside.
3. Oil based paints can cloy and pull up layers that are already down. So apply lightly and leave 24 hours between coats.
![An external view of the filling in process, as the sky reflects on our palette of black and orange](https://a.storyblok.com/f/144881/87599ba89c/handpainting-no-75-screenshot-jpe-gs-18.jpg/m/1500x0)
![Sliding the excess off of our chisel tip brush after loading it with a hot orange hue for our hand painted shop front sign](https://a.storyblok.com/f/144881/71d2246c51/handpainting-no-75-screenshot-jpe-gs-17.jpg/m/1500x0)
![Our signwriter using a Mahl Stick and chisel tip brush to finish off the hand painting part of our vintage shop sign](https://a.storyblok.com/f/144881/0162ceaba9/handpainting-no-75-screenshot-jpe-gs-20.jpg/m/1500x0)
![A look out onto the street through the gap left in our hand painted sign, before it's filled in with gold leaf](https://a.storyblok.com/f/144881/a1053f0dc8/handpainting-no-75-edited-jpe-gs-30.jpg/m/1500x0)
![Unfinished yet glorious, our hand painted sign stands guard over our shop in Shoreditch, while making our presence known on the street](https://a.storyblok.com/f/144881/229d68b652/handpainting-no-75-edited-jpe-gs-22.jpg/m/1500x0)
![Crumpled bits of gold leaf, destined to add texture and a bit of bling to our hand painted shop front sign](https://a.storyblok.com/f/144881/79acac70c1/handpainting-no-75-screenshot-jpe-gs-28.jpg/m/1500x0)
Step 3
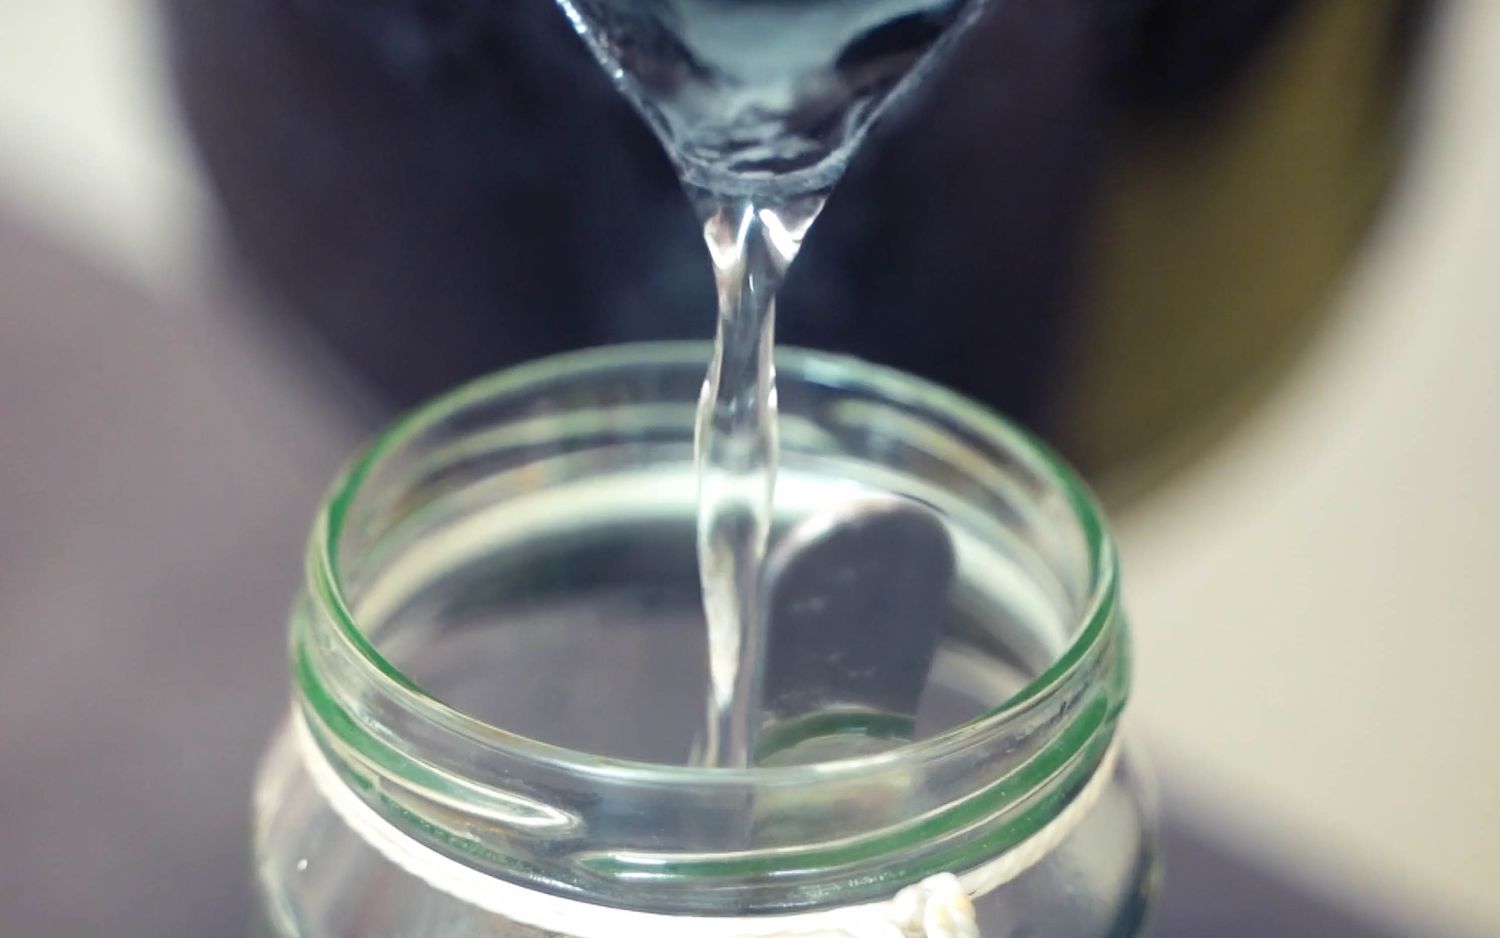
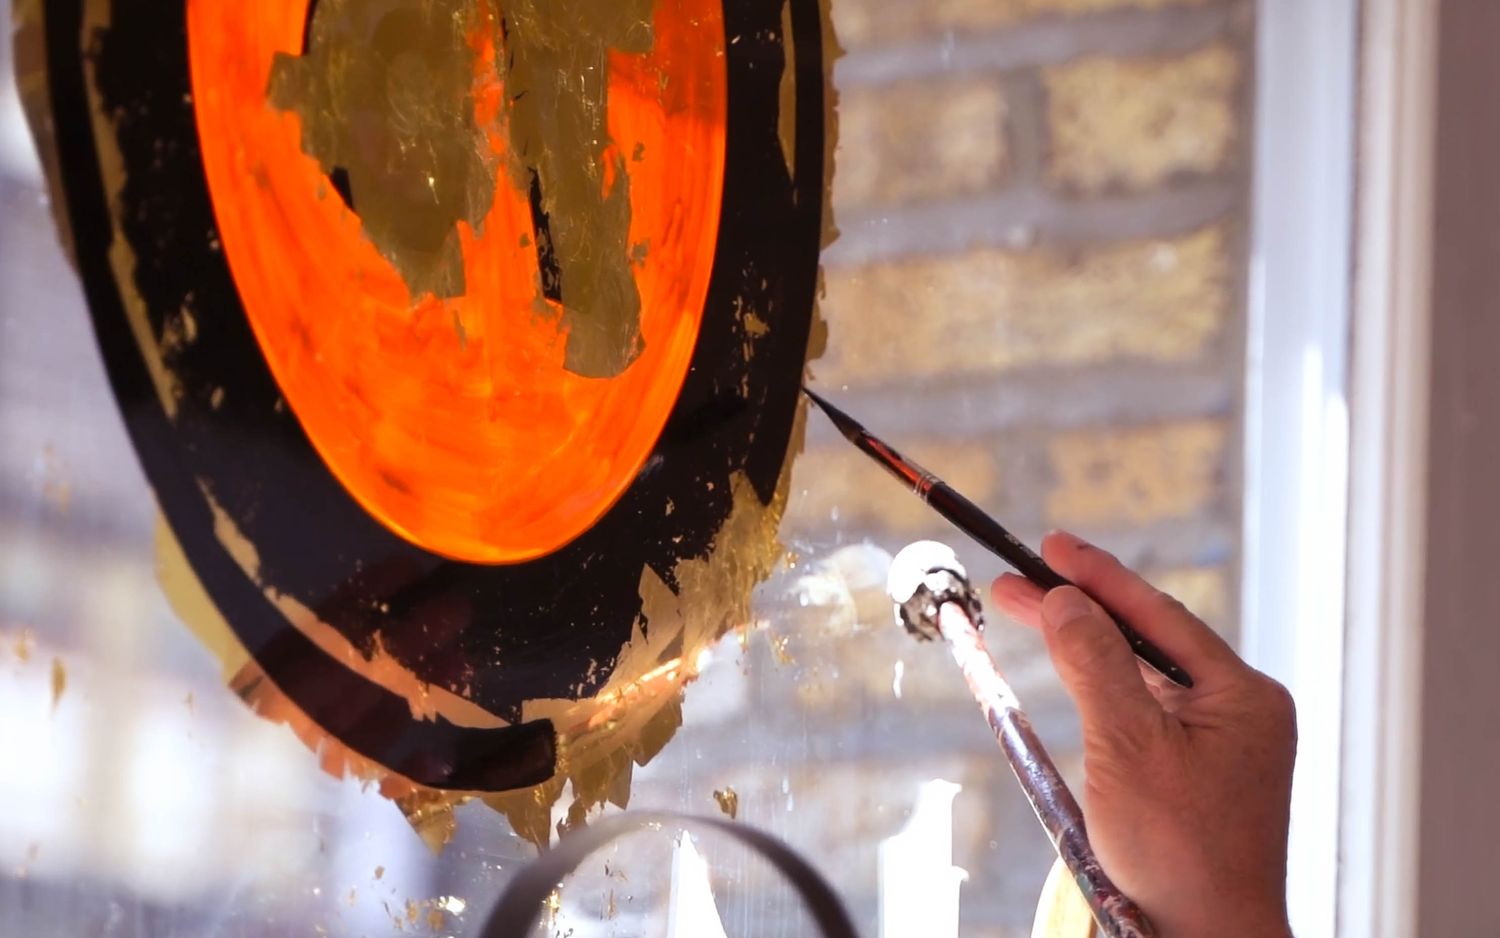
The paint is dry and begging for some bling! Time to make what we call chub juice.
It’s gelatine dissolved into warm water – the most common primer for reverse glass gilding.
Brush it on and use it as an adhesive to bond the gold leaf to your hand painted glass sign.
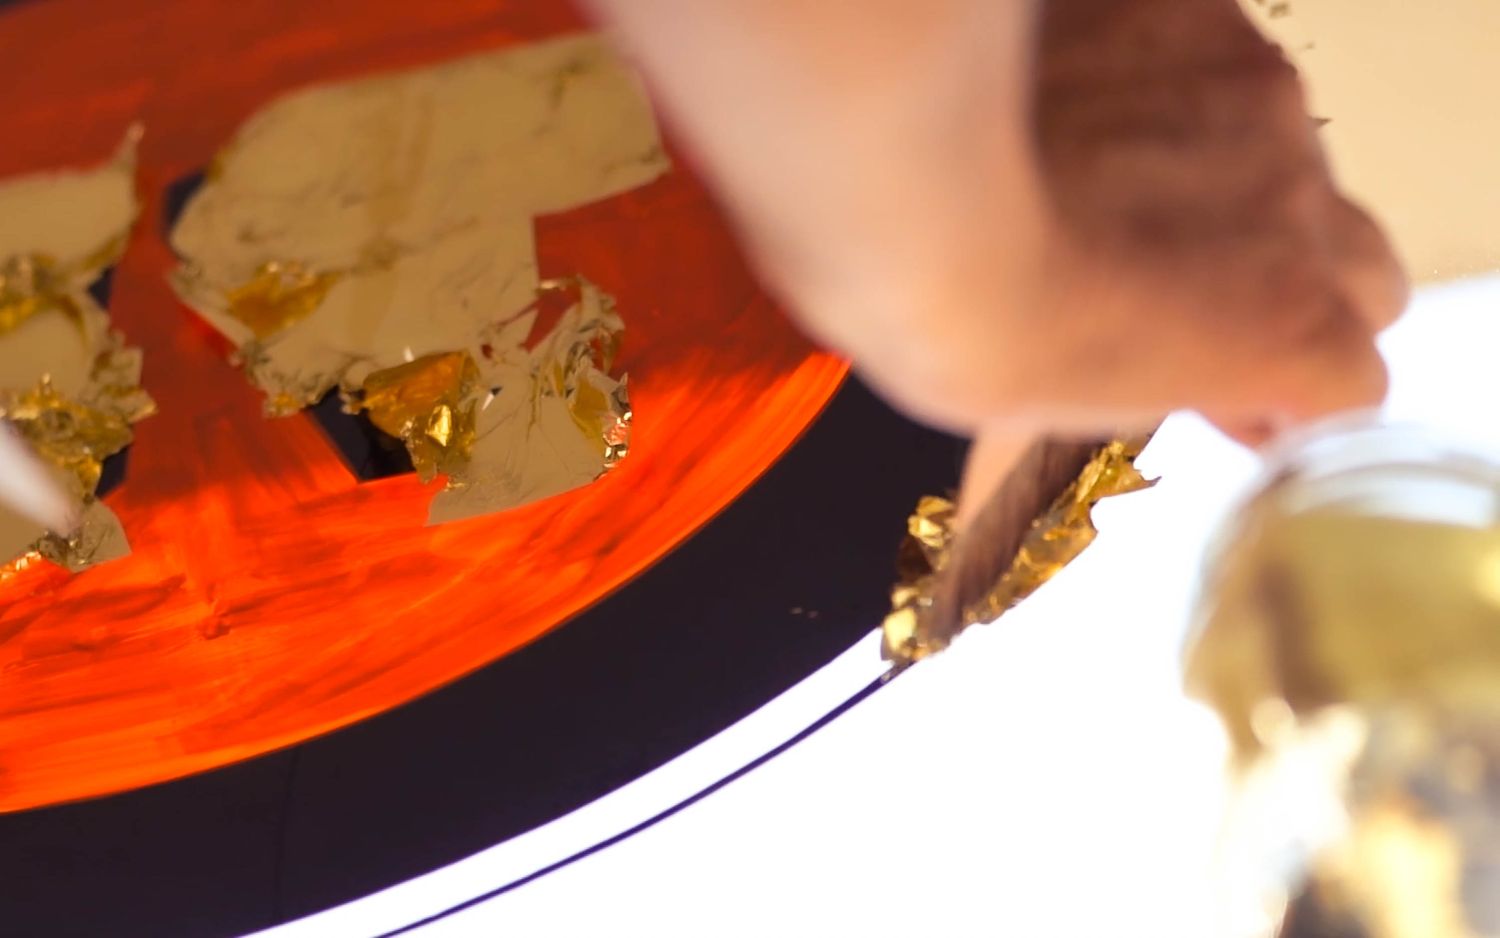
![An empty gelatine capsule, used to make an adhesive mix that will bond gold leaf to a glass surface](https://a.storyblok.com/f/144881/18e95a9b82/handpainting-no-75-screenshot-jpe-gs-23.jpg/m/1500x0)
![Pouring warm water into a jar to dissolve an empty gelatine capsule to make an adhesive mixture for gold leaf gilding](https://a.storyblok.com/f/144881/ffe2d64d49/handpainting-no-75-screenshot-jpe-gs-22.jpg/m/1500x0)
![A piece of gold leaf floating in a jar of what we call chub juice; an adhesive mixture of water and gelatine used in gilding](https://a.storyblok.com/f/144881/c3482fabea/handpainting-no-75-screenshot-jpe-gs-24.jpg/m/1500x0)
Step 4
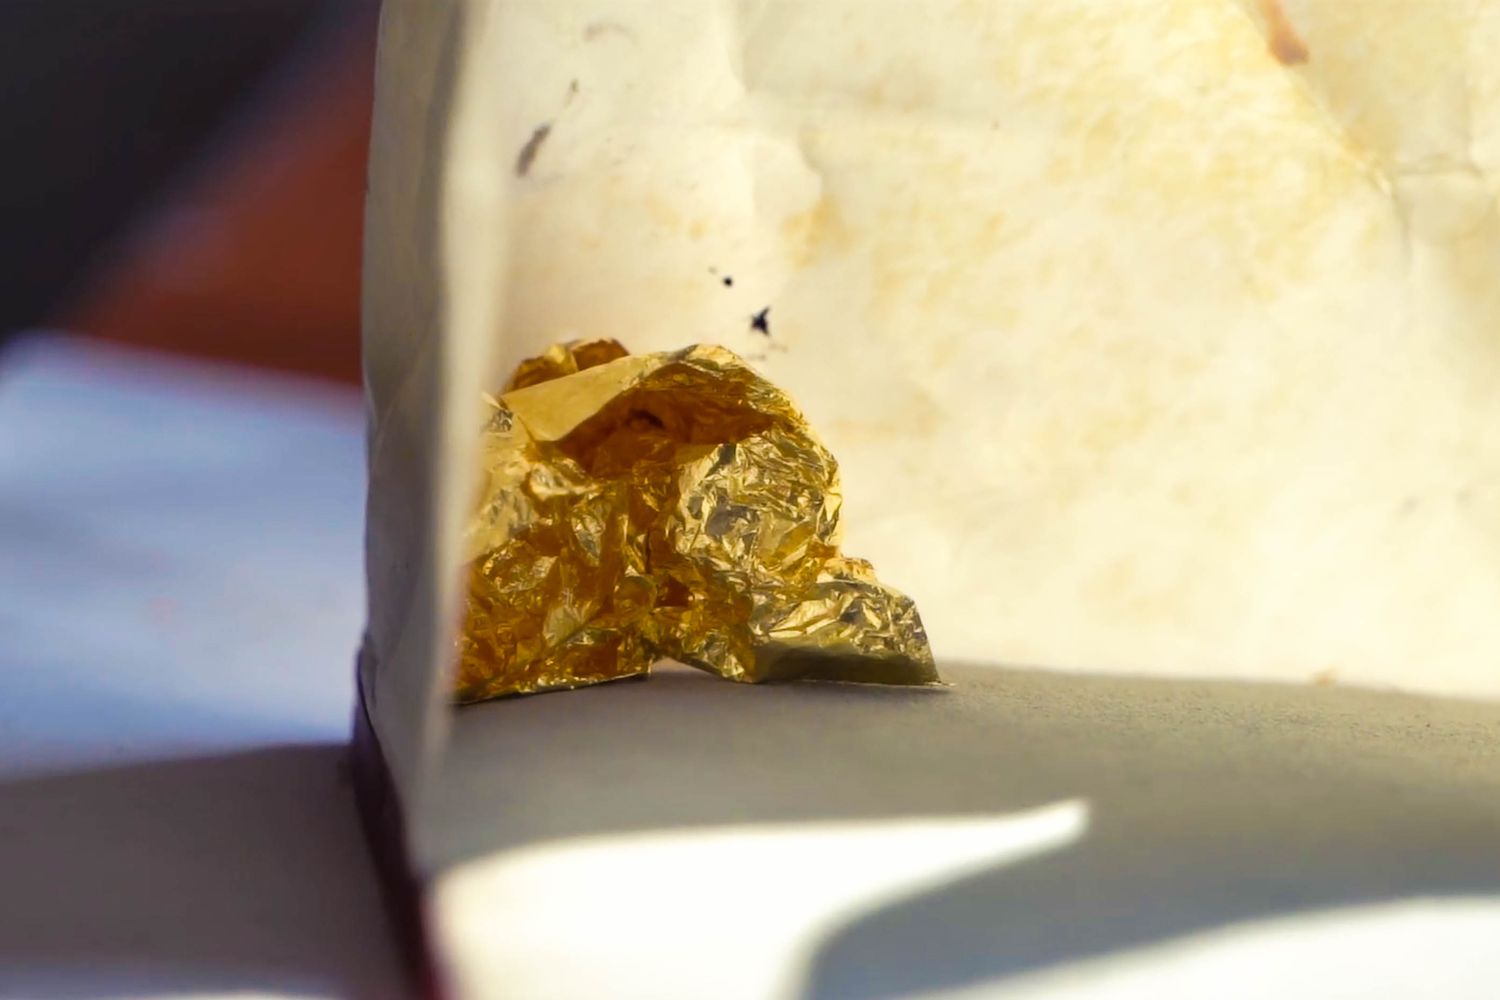
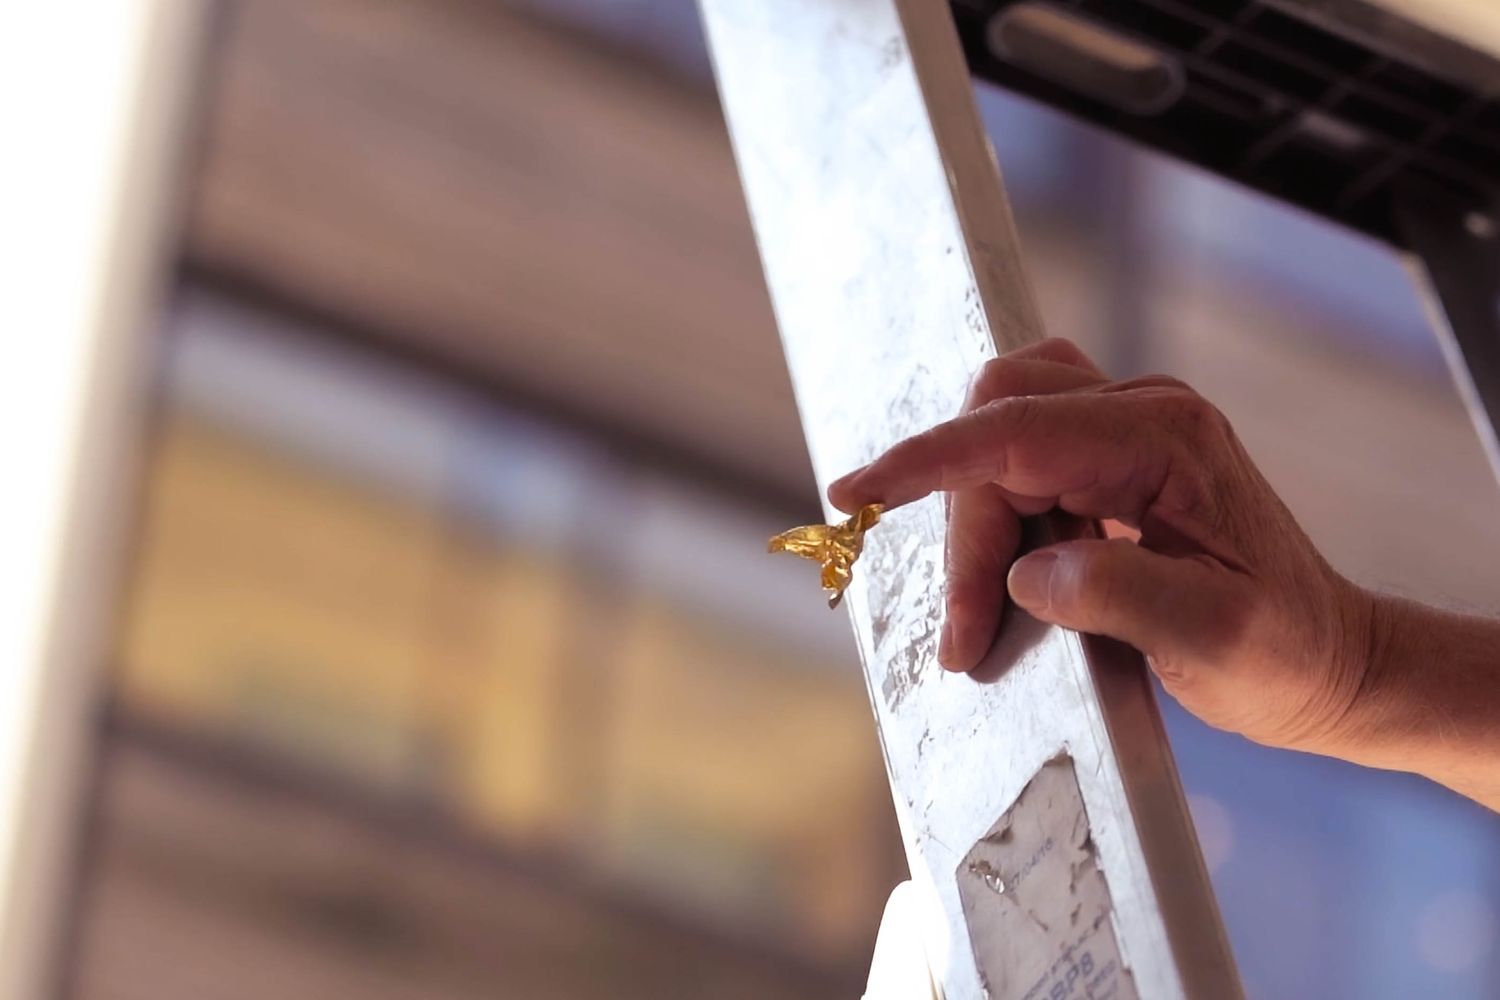
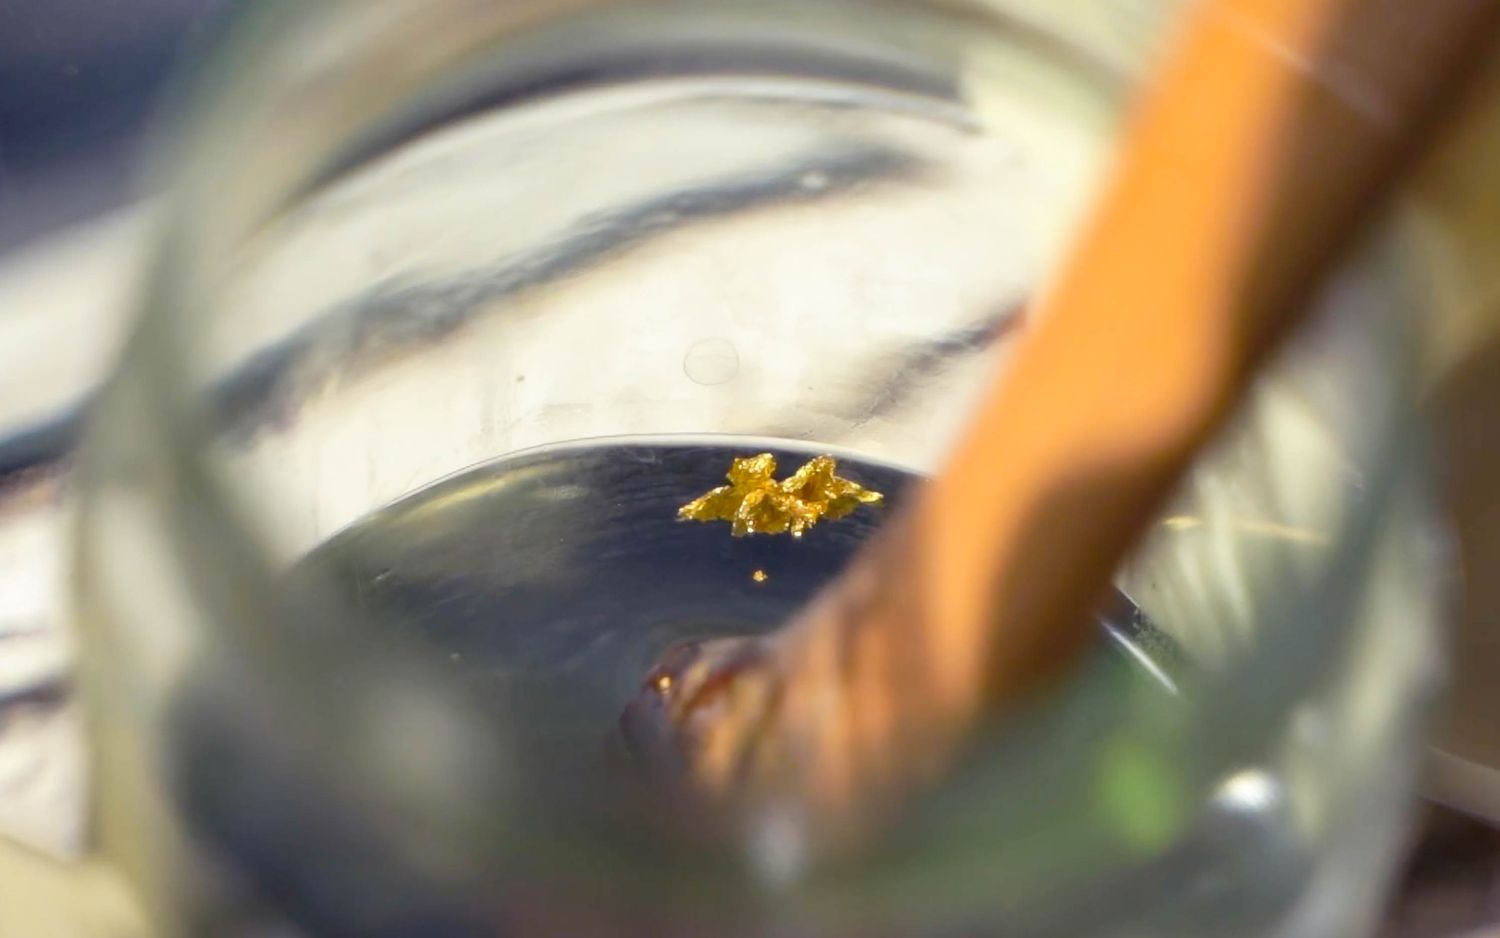
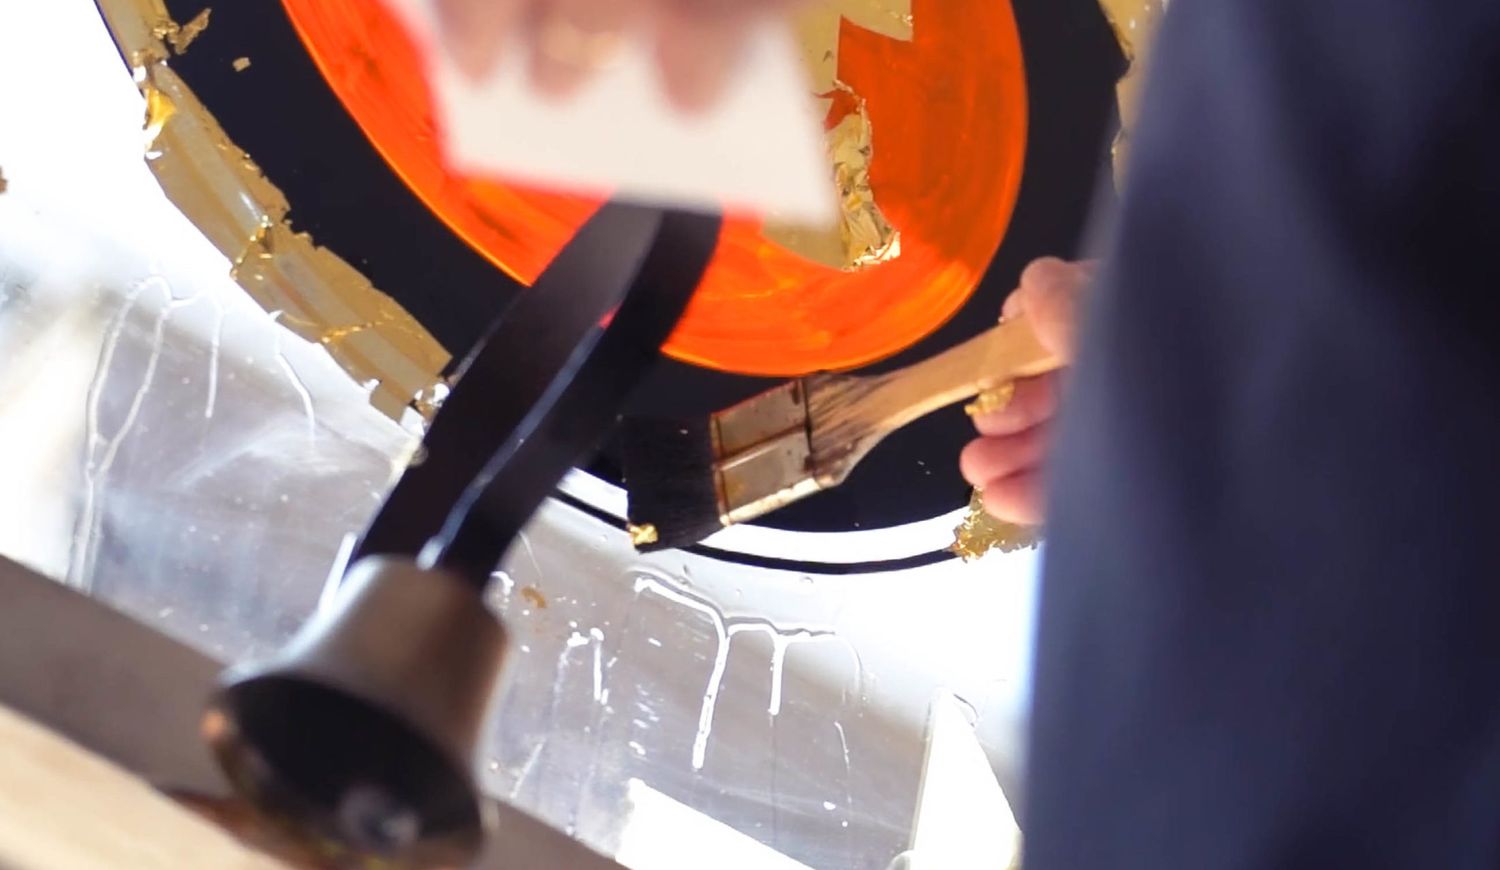
Using a gilders knife and a soft mop-like brush called a gilders tip, we gently cut the loose leaf to size and lift it from the booklet.
Gliding it over, the leaf is tamped onto the water, which then evaporates, pulling the leaf down onto the glass for maximum coverage.
As you continue gilding, overlap the leaf by about 2mm to avoid any gaps and try to lay it down flat.
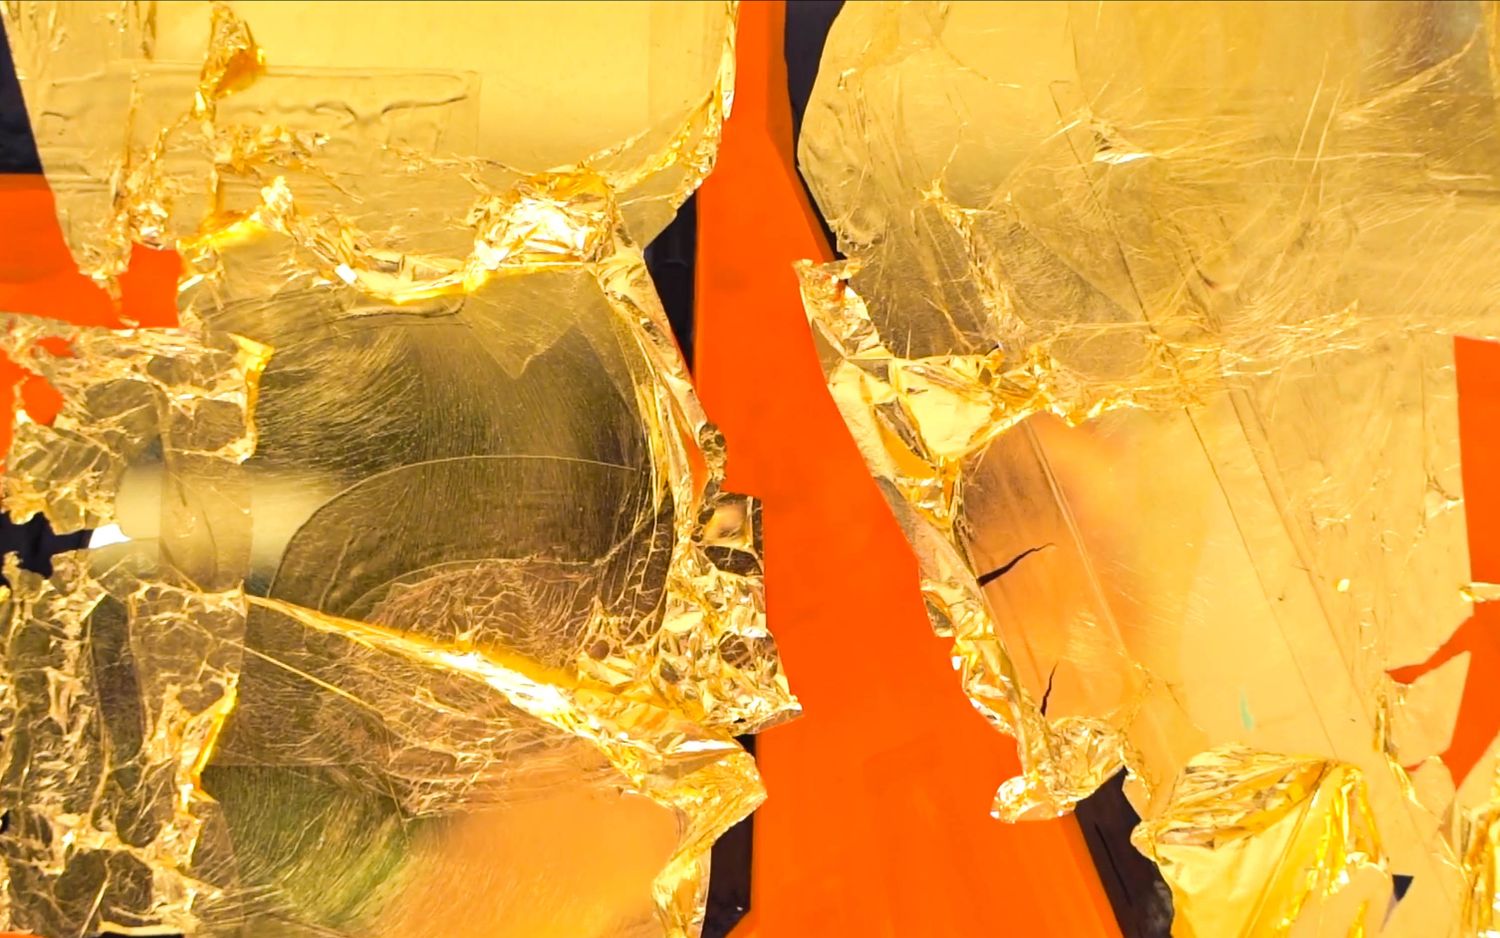
![A booklet of 23 carat extra thick gold leaf for Glyphics' hand painted and gilded vintage sign](https://a.storyblok.com/f/144881/983c8bc696/handpainting-no-75-screenshot-jpe-gs-25.jpg/m/1500x0)
![Applying liquid gelatine to our shop front sign that allows gold leaf to adhere to it](https://a.storyblok.com/f/144881/50aa806402/handpainting-no-75-screenshot-jpe-gs-29-scaled-e-1658863799718.jpg/m/1500x0)
![The reflection of gold leaf as it's tamped onto our vintage shop front sign](https://a.storyblok.com/f/144881/d1e91f4d09/handpainting-no-75-screenshot-jpe-gs-27.jpg/m/1500x0)
![Tamping gold leaf onto our black and orange window sign](https://a.storyblok.com/f/144881/9fe40d04ab/handpainting-no-75-screenshot-jpe-gs-31.jpg/m/1500x0)
![A close up of our gilded sign, showing the gold leaf we've used before it's brushed down and tidied up](https://a.storyblok.com/f/144881/1f4d779bc5/handpainting-no-75-screenshot-jpe-gs-33.jpg/m/1500x0)
Step 5
Rinse and repeat, and use the gilders tip to target any intricate areas that might have been missed out at the end.
After all the gold leaf is laid, allow the primer beneath to dry out.
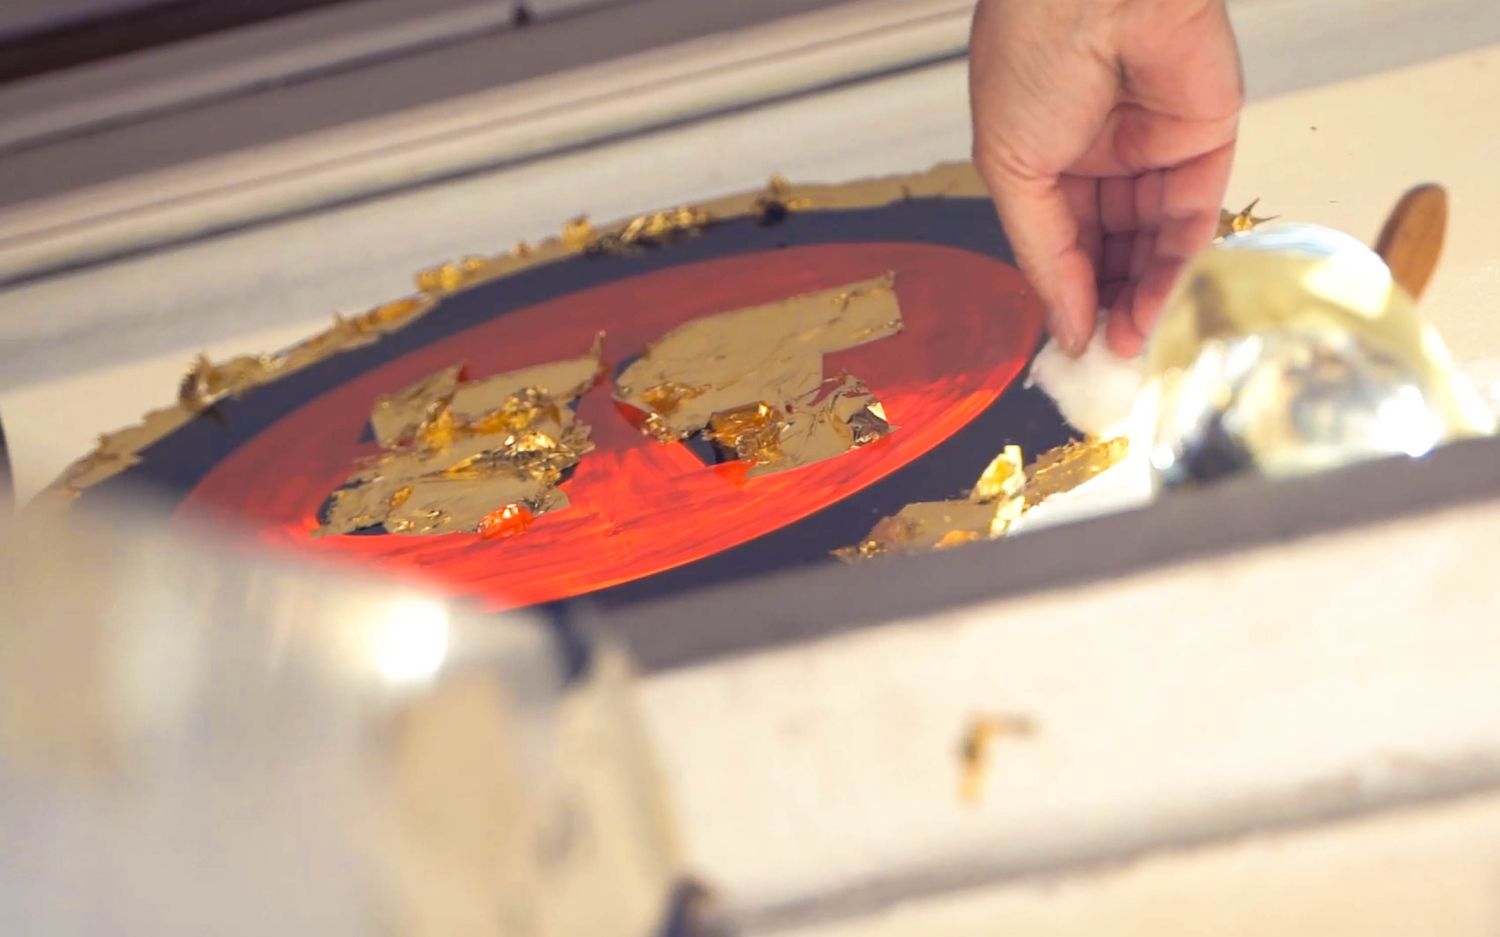
Step 6
Lightly sweep away all the loose skewings – reusing them to fill any final missed bits.
Go over the whole surface one last time to form a soft burnish on the leaf and a high gloss finish.
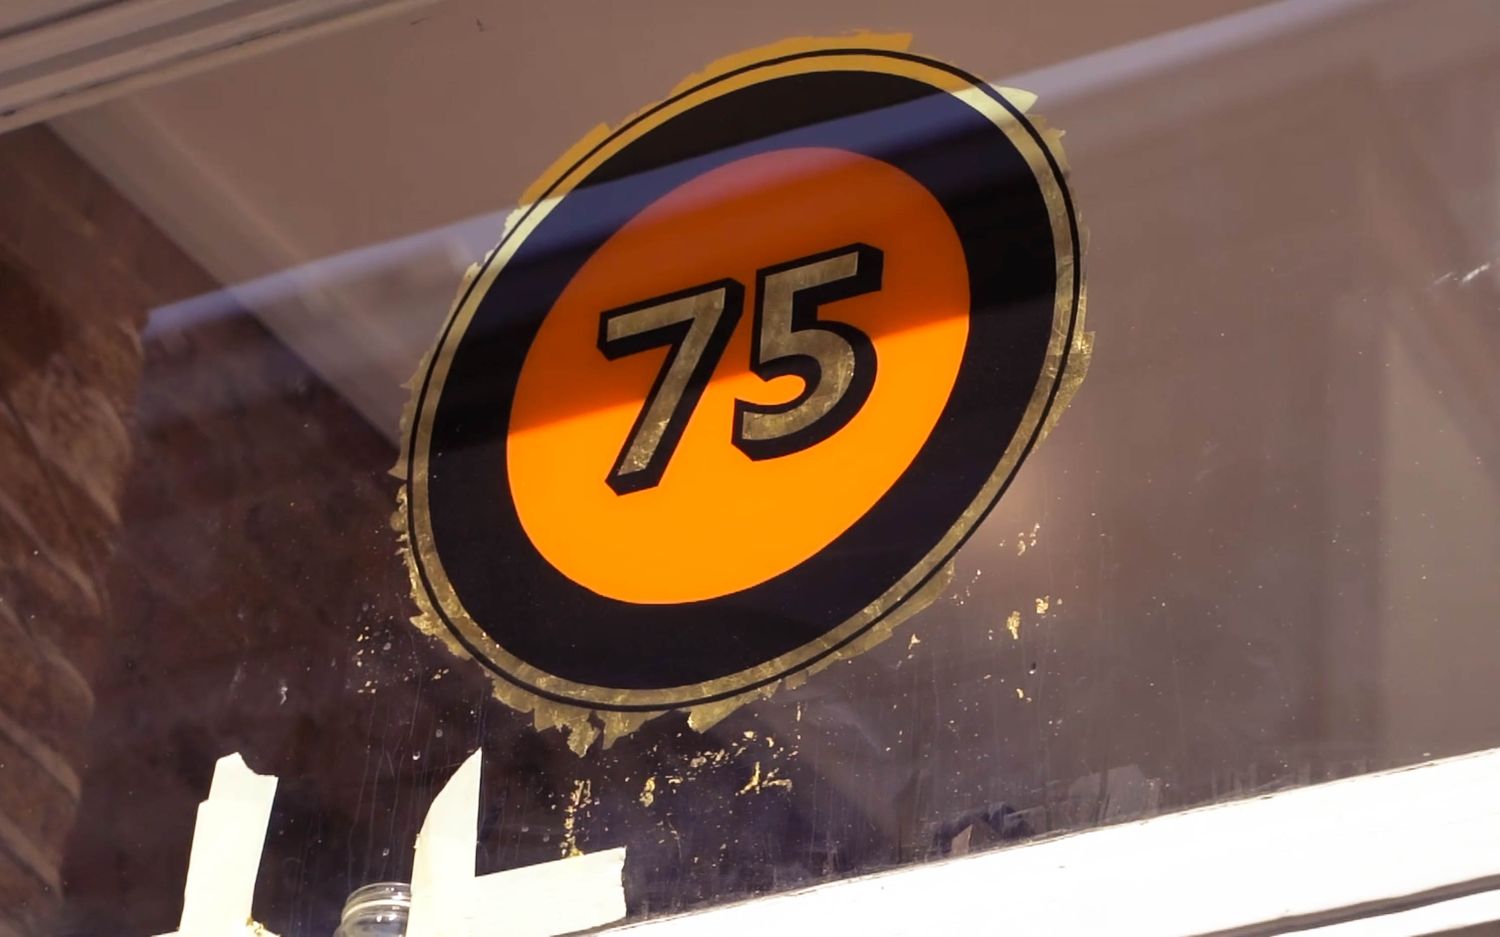
![Sweeping away all the loose skewings of gold leaf, to reuse them to fill any final missed bits](https://a.storyblok.com/f/144881/a2c90eccd1/handpainting-no-75-screenshot-jpe-gs-36.jpg/m/1500x0)
![With the skewings swept away, we went over the whole surface with the gilders tip one last time, forming a soft burnish on the gold leaf for a high gloss finish](https://a.storyblok.com/f/144881/66eb38fd17/handpainting-no-75-screenshot-jpe-gs-38.jpg/m/1500x0)
![The view of our hand painted gold leaf sign from the outside before it's tidied up](https://a.storyblok.com/f/144881/78158af625/handpainting-no-75-screenshot-jpe-gs-40.jpg/m/1500x0)
Finishing up
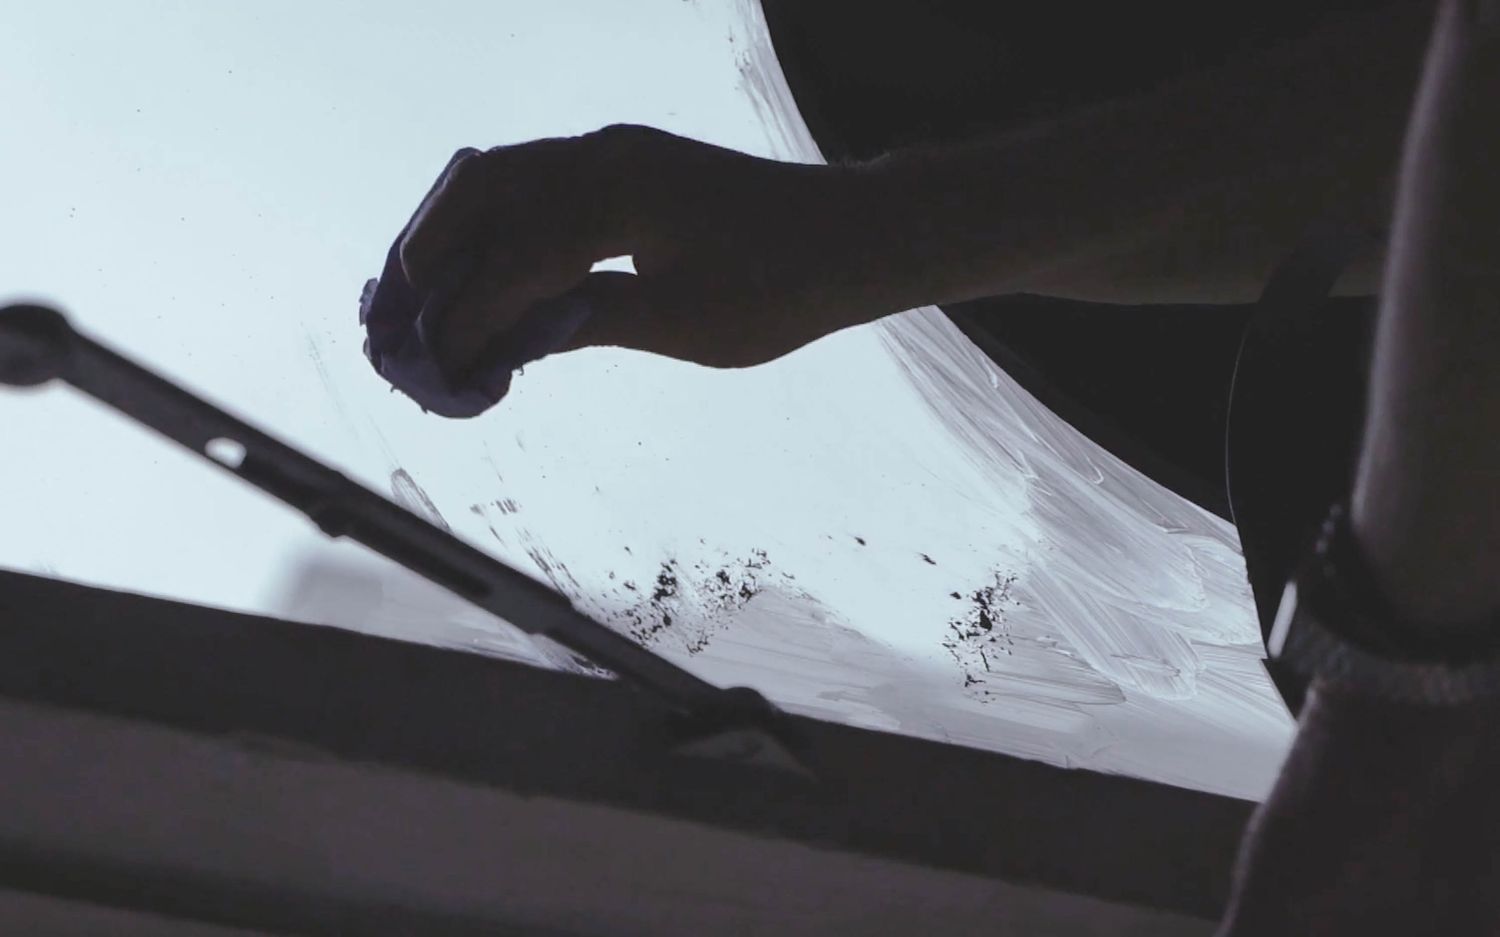
It’s the last stretch – seal the back of the sign with a layer of black paint to limit translucency while protecting the coats underneath, and if you wish, a brush-on glass paint sealer. This allows for a neat, hardwearing, lustrous finish, as well as gentle cleaning in the future.
From your surface at the start to your brushes at the end of a job – mineral spirit cleans all! Next use your thinner to erase surplus paint and gold dust, giving way to the finished sign.
![The Glyphics' signwriter seals the back of our gold leaf sign with a layer of black paint to limit translucency while protecting the coats underneath](https://a.storyblok.com/f/144881/68ba2a5e53/handpainting-no-75-screenshot-jpe-gs-39.jpg/m/1500x0)
![Our signwriter wipes away surplus paint and gold leaf using mineral spirit](https://a.storyblok.com/f/144881/97714bb2df/handpainting-no-75-screenshot-jpe-gs-42.jpg/m/1500x0)
![Our signwriter completes Glyphics' vintage gold leaf sign with a brush-on glass paint sealer](https://a.storyblok.com/f/144881/0f3893b329/handpainting-no-75-screenshot-jpe-gs-46.jpg/m/1500x0)
![Our Shoreditch shop front standing proud with our brand new hand painted gold leaf sign centre stage](https://a.storyblok.com/f/144881/9e9d2be9cc/handpainting-no-75-screenshot-jpe-gs-47.jpg/m/1500x0)
![A close up of our glistening new shop front sign - hand painted and gilded in gold leaf for a vintage touch that catches the eye](https://a.storyblok.com/f/144881/46e18f1d38/screenshot-2022-07-26-at-20.jpg/m/1500x0)
Give it a try, or contact us for your very own hand painted or gold leaf sign!